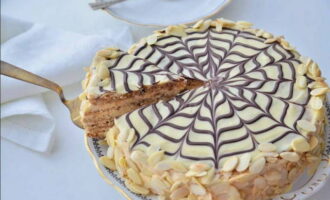
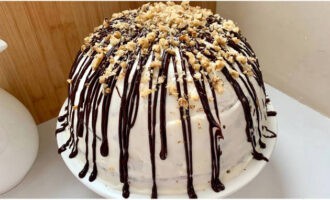
Cream cheese for cake is an indispensable delicacy for every pastry chef. This product is often used in the professional sphere, but it will also be useful for homemade cakes. With the help of cream cheese, your dessert will turn out incredibly tasty, tender and attractive. You will find the best cream recipes in our culinary selection with step-by-step recipes!
- Cream cheese for cake with cream at home
- Curd cream cheese for cake
- Step-by-step cream cheese recipe for leveling a cream cake
- How to make delicious cream cheese for leveling a cake in butter
- Homemade cream cheese for cream and cheese cake
- A simple and delicious recipe for chocolate cream cheese cake
- Cream cheese for decorating a cake at home
- Delicious cream cheese for mascarpone cake
- A simple and quick recipe for cream cheese with condensed milk for cake
- Step-by-step recipe for making cream cheese for sponge cake
Cream cheese for cake with cream at home
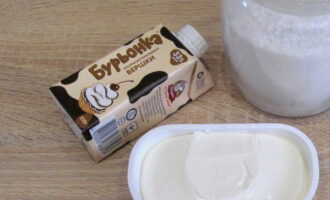
Cream cheese is ideal for layering cake layers made from any dough. It is gentle, not cloying, with a pronounced creamy taste and is somewhat reminiscent of an ice cream. The consistency of the mass is thick enough to level the surface and sides of the cakes. To prepare this cream, you must use cream with at least 30% fat content. An important point is that they must be well cooled in the refrigerator before whipping.
- Cream 200 ml. (33%)
- Cream cheese 200 (grams)
- Powdered sugar 4 (tablespoons)
-
How to make cream cheese for a cake at home? Cool the cream in the refrigerator before preparing the cream. For sweetness, we use powdered sugar, not sugar. Its fine grinding allows for quick mixing of ingredients and dissolution of sugar particles - you have to whip less, and there is no risk of overpowering the delicate cream. Cream cheese can be purchased at any store. The main thing is that it must be natural, without flavoring and aromatic additives.
-
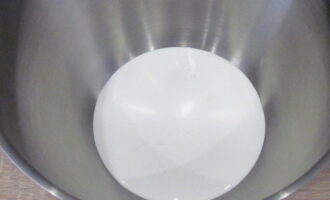
Pour the cold cream into a whipping container.
-
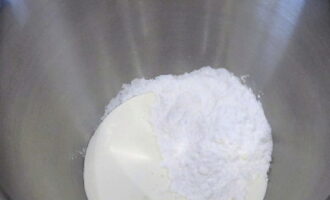
Pour the specified amount of powdered sugar into the cream.
-
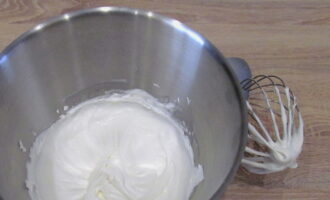
Whisk the cream and powder until fluffy. It is best to use a mixer for whipping, as it is quite difficult to achieve a thick cream by hand. The whipping process will take approximately seven to ten minutes. The volume of the creamy mass should increase two to two and a half times compared to the original amount of cream. The time for whipping the cream should not be exceeded: as soon as the foam increases and becomes stable, we stop working so as not to disturb the delicate structure and not make butter.
-
Add cream cheese. Add one or two tablespoons of cream cheese to the creamy mixture and beat the cream until smooth. Thus add the entire amount of cheese.
-
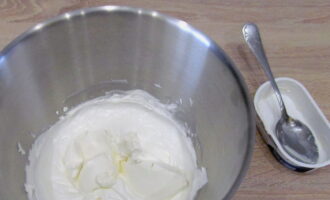
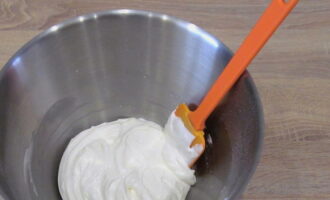
After introducing the entire volume of cream cheese, beat the cream for another minute or two. The consistency of the mass should be smooth, thick and retain its shape. Place the prepared cream in the refrigerator for at least forty-five minutes. During this time, the cream will thicken a little and stabilize.
-
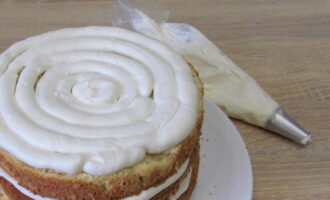
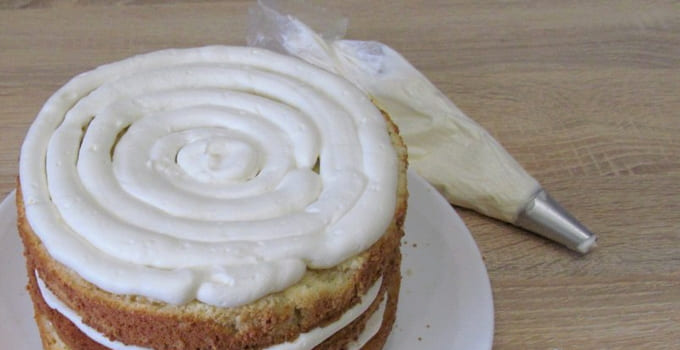
After keeping the cream in the refrigerator, you can begin finishing the desired dessert. As you can see in the photo, the mass holds the texture well. The cream cheese for the cake is ready! They can easily be used to layer cakes, level the surface, or add any decoration using a suitable attachment.
Bon appetit!
Curd cream cheese for cake
The most delicate curd cheese cream for layering cakes and finishing various desserts. It just melts in your mouth. Mascarpone is ideal for its preparation - it has a soft curd texture and creamy taste. It is better to store the prepared cream in the refrigerator until the time comes to finish the baked goods, so it retains the density and desired thickness.
Cooking time: 20 min.
Cooking time: 20 min.
Servings – 550 gr. finished cream approximately.
Ingredients:
Curd cheese – 450 gr.
Cream 30-33% - 120 ml.
Powdered sugar – 70 gr.
Vanillin - a pinch.
Cooking process:
Step 1. Cool the curd cheese thoroughly in the refrigerator. If the cheese is not cold enough, it will be difficult to achieve the desired degree of thickness of the finished cream. Place it in a mixing bowl and immediately pour powdered sugar on top. It is not recommended to replace powder with sugar, as it will take longer to whisk and dissolve the sugar particles. And this can give an unpredictable result.
Step 2. Using a mixer, beat the curd cheese together with the powder until you get a homogeneous, smooth mass. It is recommended to start at low speed and gradually increase speed.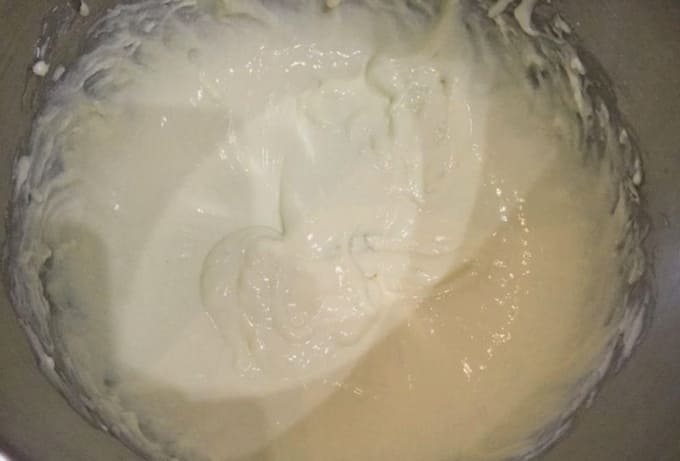
Step 3. Pour cold heavy cream into the resulting mass, add vanilla and continue beating. It is necessary to achieve a fairly dense and thick mass, which will take approximately five to seven minutes of work. As soon as the consistency of the cream becomes thick, stop whipping so that the cream does not separate.
Step 4. The finished cream forms peaks and holds its shape well. It can be used to pipe shapes and three-dimensional patterns using a cooking bag.Before use, be sure to place the mixture in the refrigerator for forty to fifty minutes so that the delicate creamy curd structure stabilizes.
Bon appetit!
Step-by-step cream cheese recipe for leveling a cream cake
A cream based on cream cheese with the addition of cream turns out to be more delicate in taste when compared with the butter version. It is very important to choose the right cream for such a cream: its fat content should be at least 30%. To beautifully level the surface of the cake, the amount of prepared cream must be calculated with a good margin. The layer of mass on top and on the sides of the cake should usually be at least five to seven millimeters - this way all the unevenness and flaws in the shape of the dessert are perfectly hidden.
Cooking time: 20 min.
Cooking time: 20 min.
Servings – 500 gr. finished cream approximately.
Ingredients:
Cream cheese – 300 gr.
Cream 33-35% - 150 ml.
Powdered sugar – 100 gr.
Cooking process:
Step 1. Be sure to cool the cream cheese and cream well in the refrigerator before preparing the cream. Products at room temperature will not produce the desired mass consistency. We choose natural cheese without flavoring additives. In no case do we replace powdered sugar with sugar - this will significantly increase the time for whipping and dissolving sugar crystals, which can give an unexpected result.
Step 2. Place cream cheese in a large mixing bowl and add powdered sugar. Start beating with a mixer at low speed and gradually increase the speed. We achieve a homogeneous smooth mass. This will take about two to three minutes of continuous beating.
Step 3.Pour the chilled cream into the resulting mass and continue whipping. It is important to catch the moment here: as soon as the cream thickens well and takes on a dense consistency, work should be stopped, since there is a risk of overpowering the delicate cream.
Step 4. Place the finished cream in the refrigerator and leave for at least an hour. It needs this time to stabilize: the cream will become denser, thicker and take on the desired consistency for leveling cakes and other desserts.
Bon appetit!
How to make delicious cream cheese for leveling a cake in butter
Cream cheese is ideal for leveling cakes, especially if it is made with butter. In this case, the mass turns out to be denser, thicker and more shaped. Of course, the fat content of the cream immediately increases and the calorie content of the finished dessert increases. To prepare high-quality cream, be sure to use a mixer. You cannot achieve a smooth consistency and the required density by hand.
Cooking time: 20 min.
Cooking time: 20 min.
Servings – 400 gr. finished cream approximately.
Ingredients:
Cream cheese – 300 gr.
Butter – 100 gr.
Powdered sugar – 70 gr.
Cooking process:
Step 1. You should choose high-quality butter for the cream, with a “pure” composition: nothing except cream should be indicated on the packaging. It is also worth paying attention to the fat content - we focus on 80 percent and above. The color of the butter affects the color of the finished cream and the appearance of the dessert as a whole: if the butter is yellow, the cream will also have a yellow tint. Before cooking, be sure to take the butter out of the refrigerator to soften, but on the contrary, cool the cream cheese thoroughly.
Step 2.Place soft butter in a mixing bowl.
Step 3. Pour powdered sugar on top and begin beating at low speed, gradually increasing the speed. At this stage, you need to achieve a homogeneous smooth mass and slight whitening relative to the original color. This will take approximately seven to nine minutes, depending on the power of the mixer. It is highly not recommended to replace powdered sugar with sugar, since it is quite difficult to completely dissolve the sugar crystals.
Step 4. Next add cream cheese. We do this little by little, spoon by spoon, since it is difficult to mix the entire volume of the product at once. In addition, cheese can simply fly around the kitchen. After adding all the cheese, beat for another minute or two, no more. If you exceed the time of working with the cream, it may separate.
Step 5. Immediately after preparation, it may seem that the cream is runny, but this is not the case. Place the mixture in the refrigerator for a couple of hours - the cream will stabilize and take on the desired consistency. It will become dense enough for perfect leveling of cakes and placement of voluminous curly patterns.
Bon appetit!
Homemade cream cheese for cream and cheese cake
To make a thick cream for a cake, it is not necessary to use butter. The ideal ingredient for this purpose is curd cheese. The cream based on it turns out to be almost universal: it can be used to layer any cake, decorate any pastries - it holds its shape perfectly. Adding cream also helps create a dense texture. It also noticeably softens the taste and makes the consistency soft and melting.
Cooking time: 20 min.
Cooking time: 20 min.
Servings – 650 gr. finished cream approximately.
Ingredients:
Curd cheese – 500-540 gr.
Cream 30-33% - 120 gr.
Powdered sugar – 70 gr.
Cooking process:
Step 1. Be sure to cool the cream in the refrigerator before preparing the cream. Only a cold product beats well and gives the desired density. Pour them into a large mixing bowl and add powdered sugar. We begin to beat the mixture with a mixer, gradually increasing the speed. We work for about five to seven minutes: the mass should become foamy, thick and noticeably increase in volume.
Step 2. Little by little add chilled curd cheese to the whipped cream. We continue to beat the mass - with the addition of cheese it becomes denser, thicker and visually changes the texture. When all the cheese is used in the cream, do not beat for too long - a minute is enough.
Step 3. Place the prepared cream in the refrigerator and leave for at least an hour. During this time, the mass will cool and stabilize, becoming thicker and more manageable. You can already see how well the cream holds its shape.
Step 4. This cream is very convenient for leveling the surface and sides of the cake. The dense but delicate consistency allows you to cover and visually hide any imperfections and flaws in the shape of the cakes. The main thing is to prepare enough cream so that you can layer it generously if necessary.
Bon appetit!
A simple and delicious recipe for chocolate cream cheese cake
One of the versions of cream cheese for cakes, which will especially appeal to chocoholics. This cream has a chocolate taste and color, as well as a slightly denser consistency than its creamy “brother.” Depending on the percentage of cocoa content in the chocolate bar, the richness of the chocolate flavor, color and density of the cream may vary.In order for the finished product to hold its shape well and melt in the mouth, it is important to choose high-quality butter with a fat content of at least 80%. And it’s also worth knowing that the cream cheese version with chocolate does not need stabilization after preparation. Simply cool the finished cream in the refrigerator.
Cooking time: 20 min.
Cooking time: 20 min.
Servings: 500 gr. finished cream approximately.
Ingredients:
Chocolate (50-60% cocoa) – 100 gr.
Butter – 100 gr.
Powdered sugar – 100 gr.
Cream cheese – 300 gr.
Cooking process:
Step 1. We begin preparing the cream by preparing the ingredients. Take the butter out of the refrigerator in advance and let it soften well. On the contrary, cool the cream cheese in the refrigerator until completely cold. Break the chocolate into small pieces.
Step 2. Place the chocolate pieces in a bowl and microwave. Melt the chocolate in intervals for five to ten seconds, stirring the mixture well each time. When the melted chocolate becomes homogeneous, stop heating. If you are unsure about using a microwave, simply place the bowl of chocolate in a water bath. This way you can completely control the melting process.
Step 3. Place softened butter, powdered sugar and melted chocolate in a mixing bowl. Start beating with the mixer at low speeds, gradually increasing the speed.
Step 4. Beat the ingredients for approximately five minutes - you should get a thick, smooth, fluffy, homogeneous mass that holds its shape and remains on the whisk.
Step 5: The next step is adding cream cheese. If the mixer is stationary and powerful, you can put out the entire volume of cheese at once.Otherwise, add it a little at a time and mix it into the total mass, beating at medium speed. You should not work at high speeds - this will create a lot of air bubbles in the cream, and the smooth consistency will be disrupted.
Step 6. When the entire amount of cream cheese has been used in the cream, stop whipping. The mass turns out to be homogeneous, plastic, thick, and forms a stable, shaped mark if you run a spoon over it.
Step 7. Place the prepared cream in the refrigerator and leave for twenty to thirty minutes to cool. The mass does not require stabilization - you can start working with it immediately after cooling. To make it easier to work with cream, you can use a pastry bag with the necessary attachments. It’s so easy to dose the cream and apply it evenly in circles for layering the cakes, not to mention decorating the surface.
Bon appetit!
Cream cheese for decorating a cake at home
Making cream cheese is absolutely easy. The main thing is to have a mixer and choose the right products. We use cream with a fat content of at least 30%. For sweetness - only powdered sugar, but not sugar with its large crystals. Cream cheese is curd cheese, natural, with a good composition and without flavoring and aromatic additives. The proportions of the components are indicated in the recipe and will not allow you to make mistakes. Cool the cream and cheese thoroughly before cooking. That's probably all the conditions. By the way, we will prepare this cream in a simplified form: you won’t have to whip the capricious cream separately. In this case, the consistency of the mass will definitely be dense and thick.
Cooking time: 15 min.
Cooking time: 15 min.
Servings: 500 gr. finished cream approximately.
Ingredients:
Cream cheese – 400 gr.
Cream 30-33% - 90 gr.
Powdered sugar – 60 gr.
Cooking process:
Step 1. Before preparing the cream, you should cool the cream cheese and cream in advance. Place these foods on the coldest shelf of the refrigerator overnight.
Step 2: To further cool the food, the bowl and whisk can also be placed in the freezer for a short time. This way the cream will quickly take on a thick consistency. Pour cold cream into a bowl and add chilled cream cheese. Immediately pour powdered sugar on top.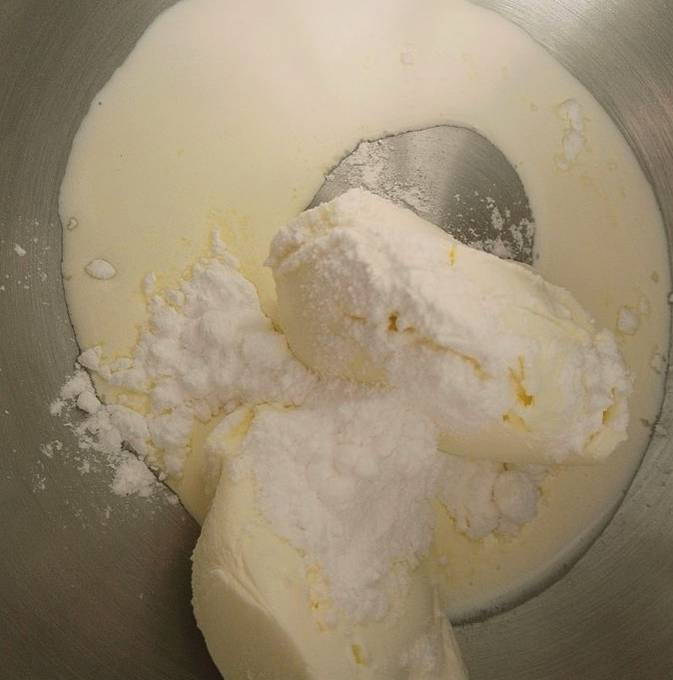
Step 3. We begin to beat at low speed so that the products do not fly upward, but gradually mix. When the mass is moistened and broken, you can speed up the speed and beat at full power. At the beginning of work, the mixture will be liquid, and this is normal. As the whipping speed increases, the cream will begin to thicken, thicken and gain strength.
Step 4. Beat the cream for approximately five to seven minutes. When a stable consistency and matte texture, as in the photo, are achieved, we stop working. You can see how well the mass holds its shape.
Step 5. The prepared cream can already be used to decorate the cake - it is manageable, retains its shape and does not need stabilization. It is especially convenient to use a cooking bag with attachments for this. If you encounter air bubbles when placing the figures, you should let the cream sit for a while at room temperature.
Bon appetit!
Delicious cream cheese for mascarpone cake
Based on mascarpone, the cream cheese is especially tender. It is ideal for layering sponge, honey and layer cakes, as well as filling eclairs, profiteroles and pavlova cakes. Another advantage of this cream is the speed of preparation.If you have a powerful mixer, the whole process will take ten to fifteen minutes. It is important to know that after cooling and stabilizing in the refrigerator, the cream becomes noticeably harder and denser.
Cooking time: 15 min.
Cooking time: 15 min.
Servings: 1 kg. finished cream approximately.
Ingredients:
Mascarpone – 250 gr.
Cream cheese – 400 gr.
Cream 30-33% - 200 ml.
Powdered sugar – 200 gr.
Step 1. Before preparing the mascarpone cream, be sure to cool the cream cheese and cream in the refrigerator - this is an important condition for a successful result. It would also be a good idea to chill the whipping container in the freezer before starting work.
Step 2. Place cream cheese and mascarpone in a mixing bowl. Immediately add cream and powdered sugar.
Step 3. Start whisking the ingredients together. We start at low speeds and gradually increase speed. The whipping time will be approximately four to five minutes. As soon as it is noticeable that the cream has become homogeneous, smooth, dense and thick, we stop working so as not to disturb the structure of the mass.
Step 4. Place the prepared cream cheese in the refrigerator for an hour or two. During this time, it will stabilize and noticeably thicken, become denser - you can already use it. For convenience, you can transfer the mixture into a pastry bag with a nozzle - this will allow you to accurately dose the cream and carefully apply it to the place of use. The bag is ideal for layering cakes using the drip method.
Step 5. Mascarpone cream cheese behaves smoothly in cakes. It retains its shape and at the same time combines perfectly with the cakes, soaking them and contributing to their softness.
Bon appetit!
A simple and quick recipe for cream cheese with condensed milk for cake
Cream cheese with condensed milk turns out dense, shaped and fluffy. It holds its shape perfectly, which makes it possible to successfully use it not only for layering cake layers, but also for leveling the surface of the cake, as well as for planting voluminous decorative figures. The recipe and the cooking process itself are quite simple, quick and can be done even by novice pastry chefs without experience.
Cooking time: 15 min.
Cooking time: 15 min.
Servings: 700 gr. ready cream cheese.
Ingredients:
Condensed milk – 200 gr.
Mascarpone – 200 gr.
Butter – 50 gr.
Cream 30-33% - 200 gr.
Powdered sugar – 30 gr.
Lemon – 1 pc. medium size.
Cooking process:
Step 1. Take the butter out of the refrigerator in advance so that it has time to soften well by the time the cream cheese is prepared. Place it in a mixing bowl and start using the mixer at high speed to get a smooth, soft mass.
Step 2. Gradually pour condensed milk into the whipped butter, without stopping working with the mixer. After adding the entire volume of condensed milk, beat for another three to four minutes so that the mass is saturated with oxygen and becomes fluffy. Then add mascarpone to the mixture one spoon at a time, continuing to whisk. When all components are connected, we stop working.
Step 3. In a separate bowl, beat the chilled cream with powdered sugar until you get a fluffy, thick mass. As soon as the whipped cream begins to form peaks, stop whipping so as not to disturb the delicate structure.
Step 4. Add whipped cream to the condensed milk mixture in portions, stirring with a spatula after each addition. At this stage, you don’t need to beat anything, just combine the whipped masses well.Place the prepared cream cheese in the refrigerator for an hour to stabilize and strengthen, after which it can be used.
Step 4. Or you can go a little further and flavor the prepared cream with lemon zest - it perfectly sets off the creamy sweetness with a delicate citrus note. Using a fine grater or a special knife, remove the zest from the surface of the lemon and add it to the cream cheese. Mix and put in the refrigerator to stabilize, after which we use it for its intended purpose.
Bon appetit!
Step-by-step recipe for making cream cheese for sponge cake
Cream cheese has become, perhaps, one of the most favorite and convenient creams for assembling and decorating cakes. Especially when it comes to the biscuit type of product. This dough is soft, porous and tender - it’s hard to think of a more suitable layer than a delicate, melt-in-your-mouth cream cheese. To prepare it, we use cold cream cheese, softened butter and powdered sugar. It is also important to use a powerful mixer for whipping - it not only simplifies the work, but also ensures uniform whipping and timely formation of a thick mass.
Cooking time: 15 min.
Cooking time: 15 min.
Servings: 1 kg. ready cream cheese.
Ingredients:
Cream cheese – 700 gr.
Butter – 350 gr.
Powdered sugar – 350 gr.
Vanillin – 1 gr.
Cooking process:
Step 1. Before preparing the cream, you should remove the butter from the refrigerator so that it softens well and becomes plastic. The product must be of high quality: we look for only cream in the composition. If the butter has a pronounced yellow tint, then the finished cream cheese will not be pure white.
Step 2.Place the chilled cream cheese in a mixing bowl and begin beating it at low speed, gradually increasing the speed. We work for one or two minutes so that the mixture softens and loosens a little.
Step 3. Without stopping whipping, add soft butter to the cheese. After the entire volume of oil has been used in the cream, beat for another minute.
Step 4. Then add powdered sugar and vanilla. Beat for a couple more minutes until the cream becomes smooth and glossy. We put the prepared cream cheese in the refrigerator for an hour to stabilize, after which we use it for layering and finishing a cake or other types of products.
Bon appetit!


