Mousse cake is a delicate and amazingly tasting dessert. Prepare an original delicacy for a home tea party or holiday table. To do this, take note of proven culinary ideas from our selection. With the help of step-by-step recipes, you can easily prepare a perfect mousse cake with your own hands.
- Homemade mousse cake with mirror glaze
- A simple mousse cake recipe for beginners
- How to make chocolate mousse cake at home?
- Delicious strawberry mousse cake recipe
- Mousse cake “Three chocolates” at home
- Mousse cake recipe from Andy Chef
- Homemade mango-passion fruit mousse cake
- Delicious raspberry mousse cake recipe
- Step-by-step recipe for making sponge-mousse cake
- Homemade mousse cake with cherries
Homemade mousse cake with mirror glaze
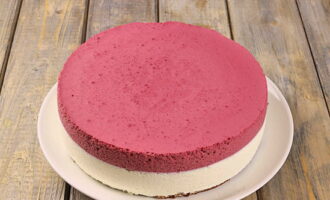
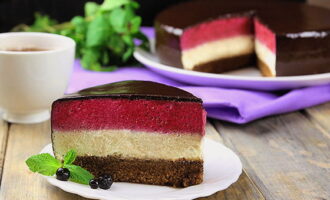
Mousse cake has a special, airy-porous consistency and light texture of its layers. The base is a chocolate sponge cake. The next layer is cream cheese. The blueberry top layer contrasts in color and adds characteristic berry notes to the overall flavor. The composition is completed with mirror chocolate glaze - thanks to it the cake looks very elegant. The cut of the cake fascinates with its color combination and bubble structure of the layers.

- Chicken egg 2 (things)
- Wheat flour 50 (grams)
- Cocoa powder 10 gr. for test
- Granulated sugar 80 gr. for test
- Baking powder ⅓ (teaspoons)
- Water 40 ml. boiling water for syrup
- Granulated sugar 40 gr. for syrup
- Cream 250 ml. for creamy layer 30-33%
- Cream cheese 190 (grams)
- Granulated sugar 3 tbsp for the creamy layer
- Vanillin 8 gr. for the creamy layer
- Gelatin 6 (grams)
- Blueberry 400 (grams)
- Cream 250 ml. for blueberry layer 30-33%
- Granulated sugar 100 gr. for blueberry layer
- Gelatin 8 gr. for the blueberry layer
- Chocolate 40 gr. for glaze
- Cocoa 60 gr. for glaze
- Water 100 ml. for glaze
- Granulated sugar 190 gr. for glaze
- Cream 60 ml. for glaze
- Cognac 30 ml. for glaze
- Gelatin 9 (grams)
- Butter for lubricating the mold
-
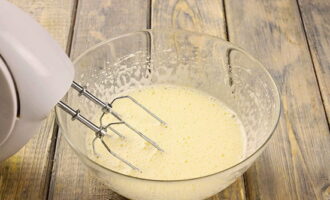
How to make mousse cake at home? To prepare the sponge cake, break the eggs into a bowl and cover them with granulated sugar. Beat everything together until you get an almost white and fairly dense foam. The sugar crystals should completely dissolve.
-
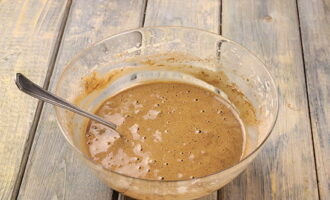
Separately mix the dry ingredients: flour, cocoa powder and baking powder. Sift the resulting dry mixture and add it to the egg-sugar foam. Mix everything together thoroughly - you should get a completely homogeneous, airy batter.
-
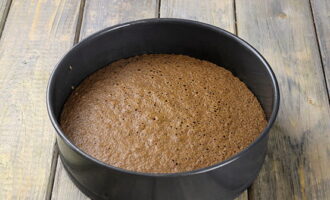
For baking, we recommend using a springform cake pan with a diameter of 22 centimeters - this is the optimal size for the ideal layer thickness. Cover the bottom of the mold with a circle of oiled parchment, and grease the inner walls with a thin layer of butter. Pour the prepared dough into the prepared pan in an even layer. Place the oven on a medium level in a preheated oven at 200 degrees. Bake for 15-20 minutes until the splinter is dry. The finished biscuit should be approximately one centimeter high. If the middle of the layer has risen during baking, carefully cut it off with a knife until a smooth surface is obtained.
-
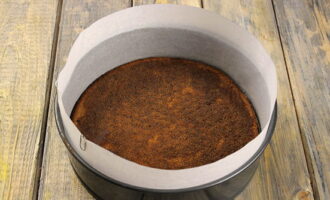
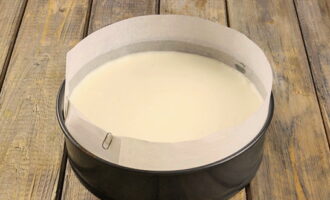
Wash the baking dish and wipe dry. We decorate the walls with a strip of parchment to form high sides, as in the photo.Place the baked biscuit in a clean pan. For the syrup, mix sugar with boiling water in the specified amount, stir until the crystals dissolve. Add cognac and stir. We soak the biscuit with the resulting syrup, distributing the liquid with a teaspoon.
-
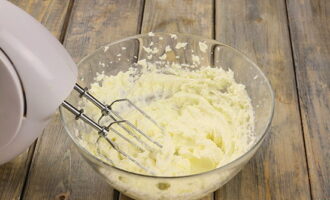
Let's move on to preparing the creamy layer. Mix room temperature cream cheese in a bowl with sugar and beat everything together with a mixer at high speed until the sugar grains dissolve.
-
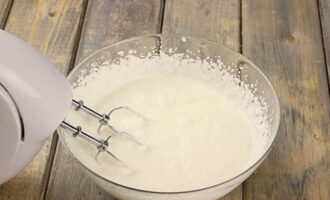
Place cold cream, vanilla sugar in a separate bowl and beat as well. We achieve thickening of the creamy mass, then add it to the whipped cream cheese. Mix both masses and beat them together for ten to fifteen seconds, no more.
-
Place the indicated amount of gelatin in a small container and add 50 ml of cold water. Leave to swell for the time specified in the instructions.
-
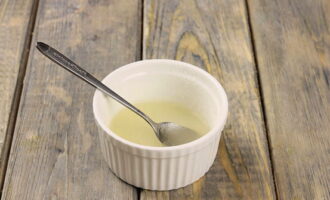
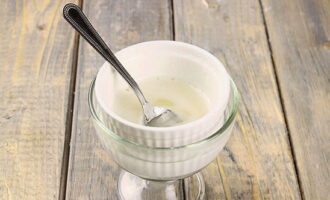
Place the swollen gelatin in a container with hot water or in a water bath and, with constant stirring, bring the gelatin to a liquid, homogeneous state. Let the finished liquid cool to a warm temperature.
-
Pour liquid gelatin into the cream cheese mixture and mix well. Pour the mixture onto the surface of the biscuit in the mold. Level the layer with a spatula or the back of a spoon. Place the mold in the refrigerator for three to four hours until the cream cheese mousse has completely hardened.
-
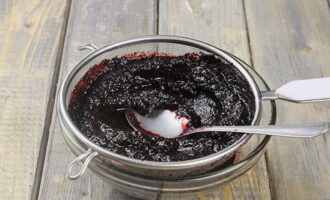
When the creamy mousse becomes dense, continue preparing the cake - take on the blueberry layer. If the berries are frozen, be sure to defrost them first. Place the blueberries in a bowl and puree with an immersion blender. Then we rub the resulting blueberry mass through a sieve. We do not use the pulp any further, but put the mashed puree aside until mixing.
-
Separately, beat the chilled cream with the specified amount of sugar. We make sure that all the crystals dissolve.
-
Mix whipped cream and pureed blueberry puree until smooth. Soak gelatin in 60 ml. cold water, then bring it to a liquid state, as in the case of creamy mousse. Mix the blueberry-cream mixture and dissolved gelatin.
-
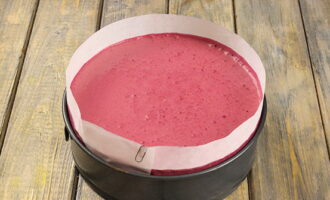
Pour the resulting mixture over the cream cheese mousse, smooth the surface with a spatula and put the mold back in the refrigerator for three hours so that the blueberry layer hardens.
-
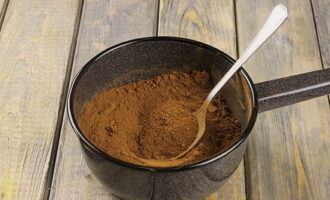
When the blueberry mousse hardens, we begin to prepare the mirror glaze. To do this, immediately pour 75 ml of gelatin. cold water and leave to swell. In a saucepan, mix the specified amount of granulated sugar and sifted cocoa powder.
-
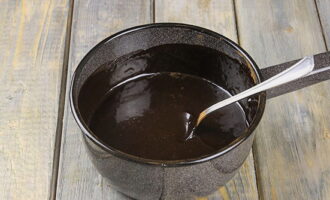
Pour the specified amount of cream and water into the dry mixture of sugar and cocoa. Place the saucepan on the stove and stir the contents. Bring the glaze to a boil, stirring vigorously - the mass should become completely homogeneous. Immediately after boiling, remove the saucepan from the stove and add chocolate, broken into small pieces and pour in cognac. Stir until smooth.
-
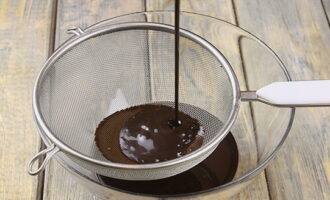
Heat the swollen gelatin, dissolve it and pour it into the chocolate glaze. Mix the mixture well and strain it through a fine sieve, then let it cool slightly.
-
We take the mold with the sponge cake and mousse layers on it out of the refrigerator, remove the bottom and sides. Don't forget to remove the parchment from the bottom of the sponge cake.
-
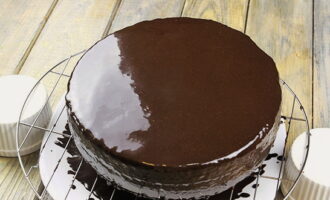
We place the cake blank on a wire rack to make it easier to cover it with mirror glaze. Place a wide flat plate under the wire rack to catch any dripping glaze. We cover the workpiece with warm mirror glaze, pouring it onto the surface of the cake. Any glaze that drips into a bowl can be strained and used for coating again.Or collect in a convenient container and put in the refrigerator until next use.
-
Place the mousse cake covered with mirror glaze in the refrigerator. When the glaze has completely hardened, the dessert can be served.
Bon appetit!
A simple mousse cake recipe for beginners
Mousse cakes are loved by many for their lightness and melt-in-your-mouth texture. It may seem that it is impossible to prepare such a dessert yourself at home. But that's not true. In general, the technology for preparing this type of cake is not complicated and can be done in any home kitchen. The main thing is to maintain proportions and choose quality ingredients. This mousse cake includes a sponge base and one airy berry layer. Cover the surface with glossy glaze. Each step is described in detail in the recipe and accompanied by a corresponding photo - everything will work out!
Cooking time: 1 hour 20 minutes. excluding hardening time.
Cooking time: 55 min.
Servings: 6.
Ingredients:
- Eggs – 3 pcs.
- Granulated sugar – 120 gr.
- Wheat flour – 160 gr.
- Baking powder – 1 tsp.
- Berries – 350 gr.
- Granulated sugar for berry mousse – 100 gr.
- Egg whites – 2 pcs.
- Cream 30-33% for berry mousse – 200 gr.
- Instant gelatin for berry mousse – 10 g.
- Cream 30-33% for glaze – 100 ml.
- Chocolate – 100 gr.
- Instant gelatin for glaze – 10 g.
- Butter - for greasing the pan.
Cooking process:
1. Break the eggs into a large bowl and begin to beat them with a mixer at low speed, gradually increasing the speed. We work for several minutes until the egg foam begins to turn white and acquires more density.
2.Pour granulated sugar into the egg mass and continue whisking until the sugar crystals dissolve and the mass itself becomes even fluffier and denser.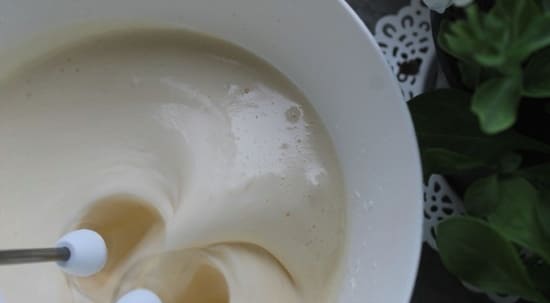
3. In a separate container, mix flour with baking powder and sift this mixture. Add it to the egg-sugar mixture and mix gently with a spatula. The result is a homogeneous dough of medium thickness.
4. Prepare the baking dish. We recommend using the detachable version - it’s more convenient. Cover the bottom with a cut out circle of oiled parchment, and grease the inner surface of the sides with a thin layer of butter.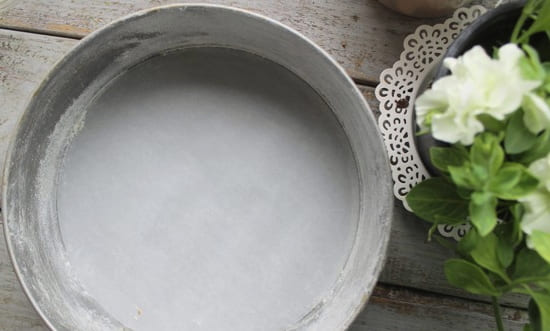
5. Pour the prepared biscuit dough into the mold and place it on the middle level of the oven preheated to 180 degrees. Bake for thirty minutes. After this time, check the readiness of the biscuit with a match or toothpick. If the stick comes out dry, the product is ready and can be removed from the oven. Let the cake cool slightly and then remove it from the mold.
6. Pour gelatin into a small container and fill it with 50 ml. cold water. Stir and leave to swell for fifteen minutes.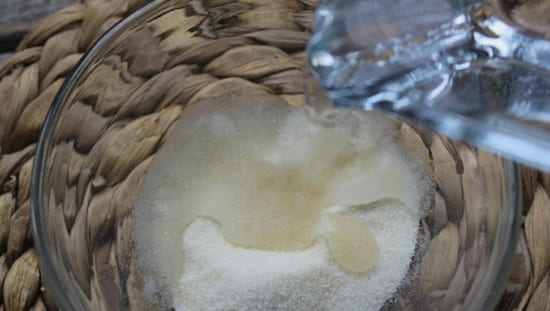
7. Place the washed and dried berries in a saucepan and add half of the specified volume of granulated sugar. Place the container on the stove and, stirring constantly, bring the contents to a boil. Cook the berries in sugar syrup for five to seven minutes, then use an immersion blender to puree them. We work with a blender directly in the pan.
8. Let the prepared puree cool to approximately 60 degrees and add the swollen instant gelatin to it. Stir everything together until the gelatin dissolves.
9. In a separate bowl, beat the chilled cream until soft and fluffy.When the moment comes for the peaks to stretch out, stop whipping so that the cream does not separate.
10. Add whipped cream to the berry puree with gelatin and gently mix until smooth.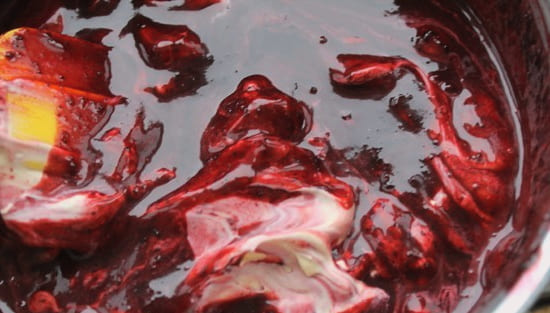
11. In a separate container, beat the egg whites until stable foam. Then pour the remaining amount of granulated sugar into the foam and continue to work with the mixer until the sugar crystals are completely dissolved.
12. Stir the protein cream into the berry-cream mass, carefully mix everything together with a spatula.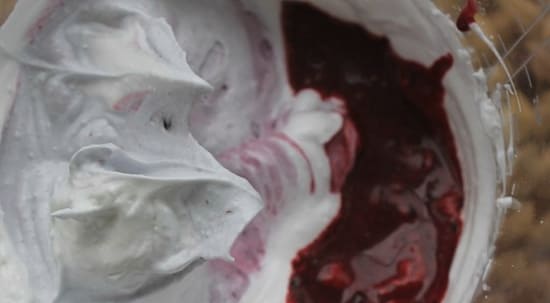
13. Cut off the top of the cooled sponge cake - as a rule, it rises during baking, and we need an absolutely even sponge layer in the finished cake.
14. We also trim the hard edges around the circumference. When cutting, take into account that the size of the remaining sponge cake circle must match the diameter of the mold for assembling the cake.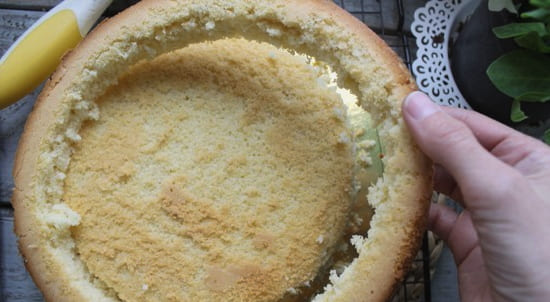
15. Place the trimmed biscuit in a suitable shape. Pour the prepared berry mixture on top. Level the surface. If there are air bubbles on top, you can knock the mold on the table - excess air will come out. Place the cake pan in the refrigerator for three to four hours. The mousse layer should completely harden.
16. To prepare the glaze, heat the cream in a saucepan until hot. Dip the broken chocolate into them and stir until completely dissolved.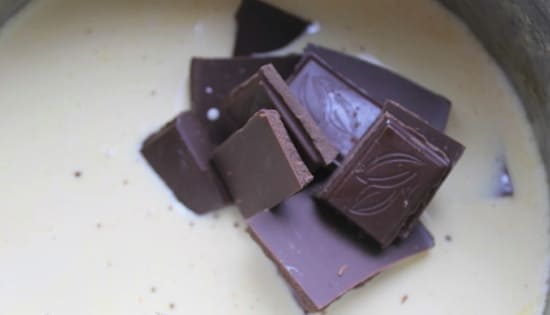
17. The mass should be homogeneous, without lumps.
18. Soak instant gelatin in 50 ml. cold water for fifteen minutes. After the specified time, add the swollen gelatin to the now slightly cooled chocolate-cream mixture and stir everything together until smooth.
19. Take the cake blank with the frozen mousse layer out of the mold and place it on the wire rack. Don't forget to place a wide plate underneath to catch any dripping glaze.Cover the surface of the cake with chocolate glaze. You can cover only the top, or you can also process the edges.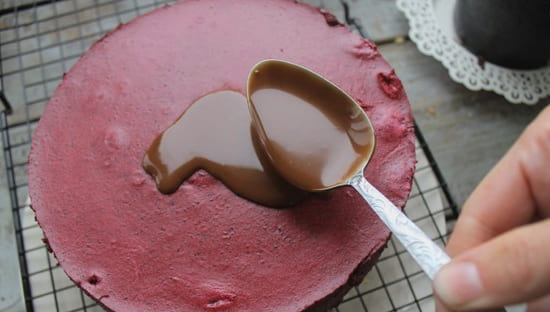
20. If we leave the edges of the cake without icing, then the very contrast of the berry and biscuit layers looks like a dessert decoration. After coating with glaze, place the cake in the refrigerator for final cooling. When the chocolate coating has completely hardened, the cake is ready to be served.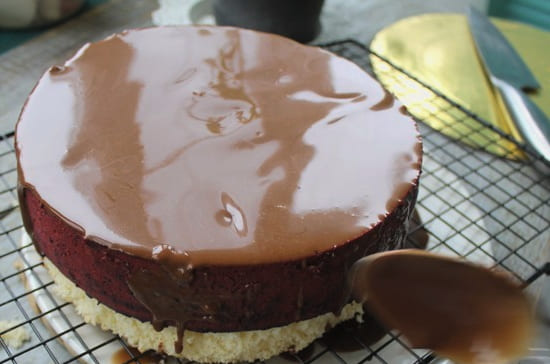
21. A portioned piece looks very attractive. The airy texture of the mousse layer is visible and it combines very well with the porous sponge cake.
Bon appetit!
How to make chocolate mousse cake at home?
An incredible cake that captivates with its soft chocolate taste and the most delicate airy texture of the mousse layer. An interesting point: to highlight the chocolate richness, we make a layer of caramelized bananas between the sponge cake and the mousse. Their specific note fits perfectly into the overall taste of the dessert. To maintain the mousse texture of the chocolate layer, we use marshmallows - these weightless marshmallows give the mousse a slight springiness. By the way, we prepare the sponge cake without adding flour - the dough gains density thanks to eggs and chocolate.
Cooking time: 1 hour 15 minutes.
Cooking time: 1 hour.
Servings: 6.
Ingredients:
- Eggs – 2 pcs.
- Salt – a pinch.
- Bitter chocolate for biscuit – 50 gr.
- Butter for biscuit – 20 gr.
- Granulated sugar – 40 gr.
- Marshmallow – 200 gr.
- Bitter chocolate for mousse – 180 gr.
- Cream 30-33% - 300 gr.
- Cream 20% - 100 gr.
- Butter for bananas – 20 gr.
- Vanilla sugar for bananas – 150 gr.
- Bananas – 1 pc. medium size.
- Butter – for greasing the mold.
Cooking process:
1. Break the eggs over a bowl and separate the whites from the yolks.Beat the whites together with a pinch of salt into an airy, stable foam.
2. Place the yolks in a bowl, fill them with granulated sugar and beat with a mixer at high speed until you get an almost white dense foam. Melt butter and chocolate, broken into pieces, together in a water bath or in the microwave. Pour the resulting chocolate mixture into the yolk foam and stir.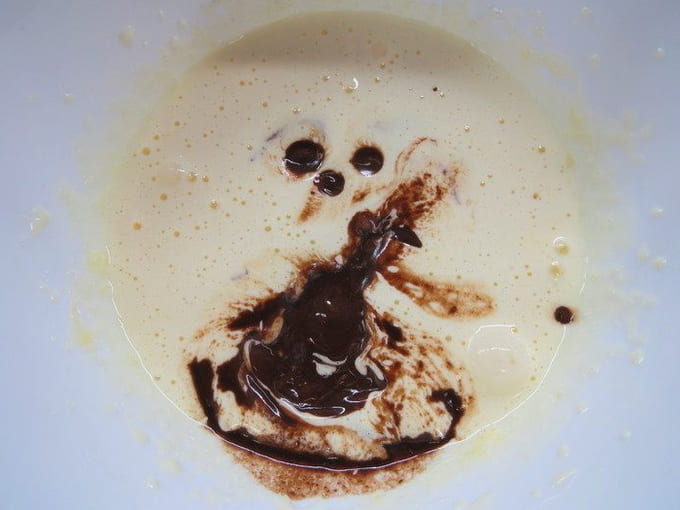
3. Add the whipped whites into the yolk-chocolate mixture in portions, gently kneading with a spatula after each addition.
4. Pour the resulting dough into a round springform pan with a diameter of 19-20 cm, greased with butter. To make it easier to remove the biscuit from the mold later, you should line the bottom with oiled parchment before pouring the dough.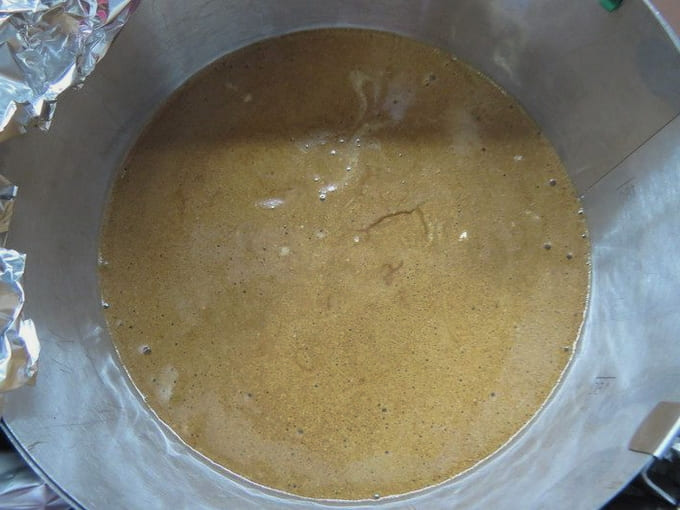
5. Place the mold with chocolate dough in an oven preheated to 180 degrees on a medium level. Bake for 12 minutes. Remove the baked goods from the oven and let cool. After this, carefully remove the cake from the mold, remove the parchment and immediately place it on a round base on which the cake will be assembled.
6. Let's move on to caramelizing bananas. Melt butter in a frying pan and pour vanilla sugar into it. Mix with a spatula. Peel the banana, cut into circles seven millimeters thick and place in butter caramel. Fry the bananas in caramel for one to one and a half minutes on each side until they darken slightly.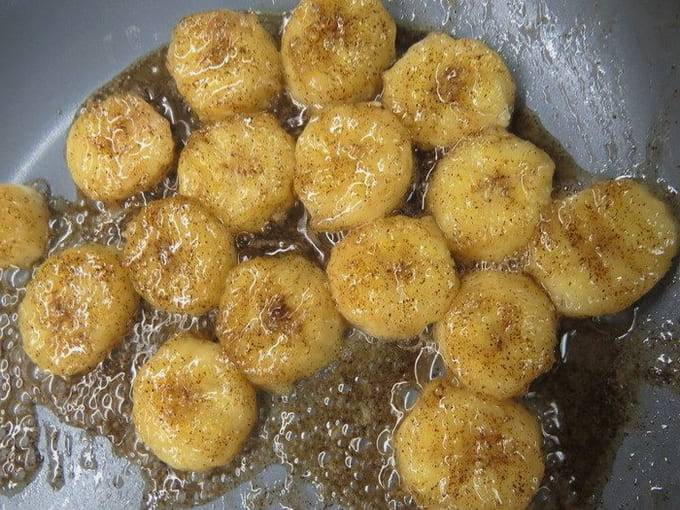
7. Place the sponge cake on a lining into a springform pan of suitable diameter. Place caramelized bananas on the dough and distribute them evenly over the entire area. Place the mold, along with the sponge cake and a layer of bananas, in the freezer until the mousse is laid out.
8. To prepare the chocolate mousse, place the marshmallows in a bowl.Place the bowl in the microwave and heat the marshmallows in bursts of ten to fifteen seconds until they begin to melt. Then pour in 20% cream, mix and continue heating in the microwave, remembering to stir well after each short-term heating. When you get a homogeneous mass, stop heating.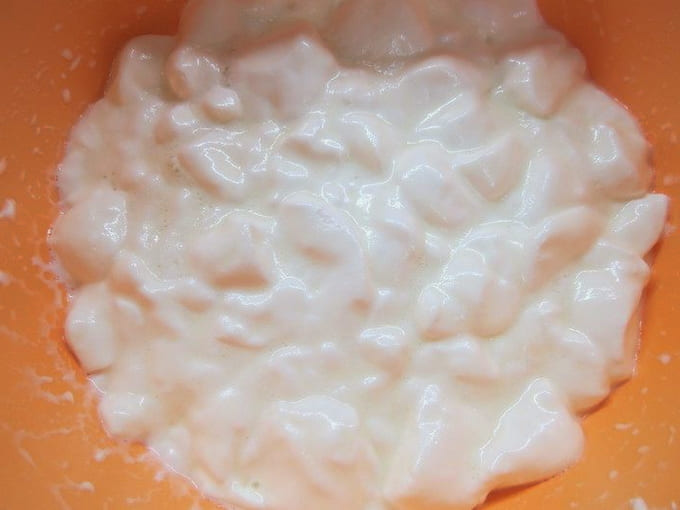
9. Break the chocolate into pieces and place them in a bowl. Place the bowl in a water bath and melt the chocolate.
10. Add melted chocolate to the marshmallow and cream mixture, mix well until smooth.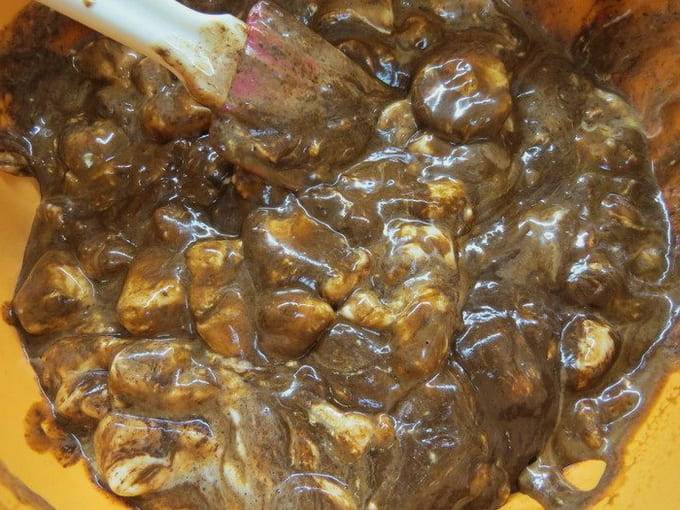
11. Separately, beat the chilled cream until stable foam.
12. Add creamy foam to the chocolate mass.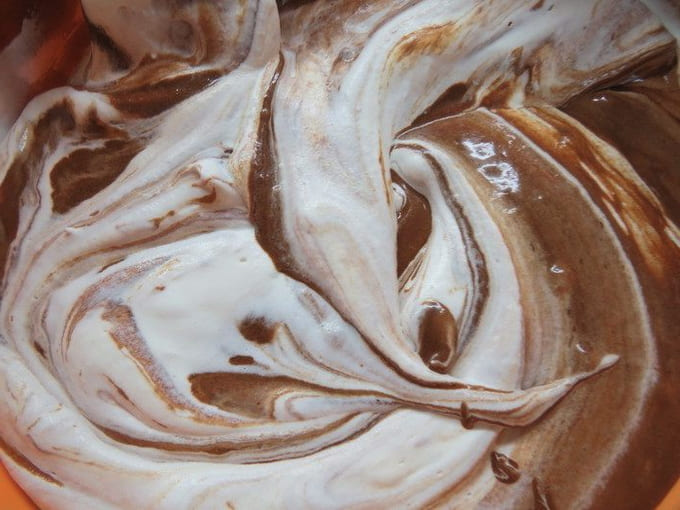
13. Mix both masses until completely homogeneous.
14. Take the mold with the base out of the freezer and place the prepared chocolate mousse on it. Level the surface with a spatula. Place the cake in the refrigerator for several hours to allow the mousse to harden.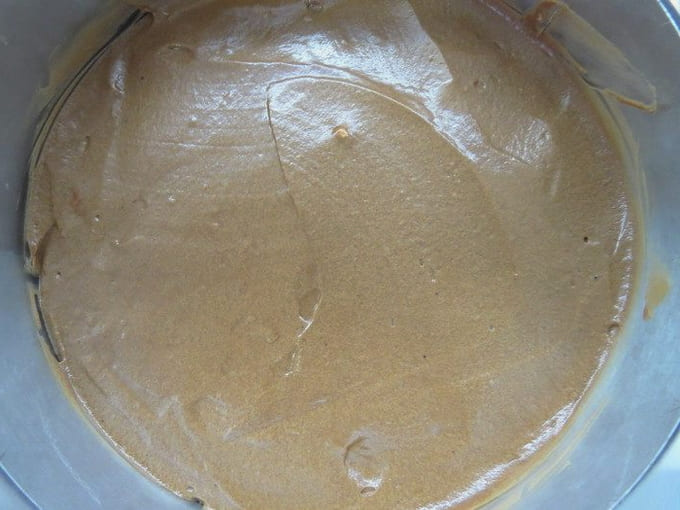
15. After hardening, open the edges of the springform pan, take out the cake on the lining and transfer it to a plate. Cut into portions already on the table.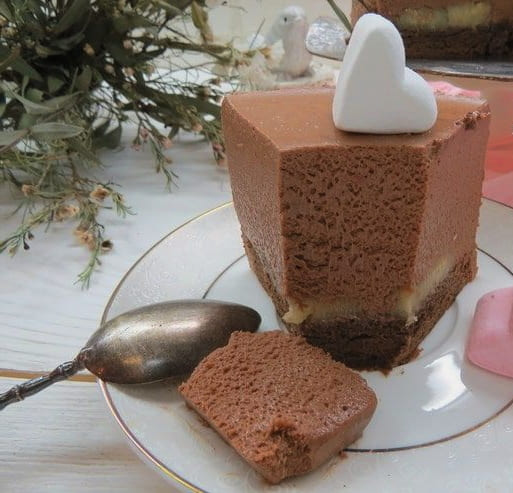
Bon appetit!
Delicious strawberry mousse cake recipe
This strawberry mousse cake is easy to make. First, we use shortbread crumbs as a base. Baking in the oven is not required - this saves time and simplifies the process. Secondly, we make only one mousse layer. As a flavor and color accent, fill the surface with bright jelly. For decoration, pipe voluminous decorative rosettes from the whipped cream. For all its simplicity, the cake is able to please even the most demanding sweet tooth.
Cooking time: 60 min. excluding hardening time.
Cooking time: 50 min.
Servings: 6.
Ingredients:
- Shortbread cookies – 100 gr.
- Butter – 50 gr.
- Cocoa powder – 2 tsp.
- Cream 30-33% for mousse - 300 gr.
- Strawberries – 600 gr.
- Powdered sugar for mousse – 100 gr.
- Lemon juice for mousse – 2 tbsp.
- Gelatin for mousse – 10 g.
- Powdered sugar for jelly – 2 tbsp.
- Gelatin for jelly – 5 g.
- Cream 30-33% for decoration – 100 gr.
- Powdered sugar for decoration – 3 tbsp.
Cooking process:
1. Break the cookies into pieces and pour them into the chopper bowl. Add cocoa powder, close the lid of the device and grind the ingredients until you obtain fine chocolate chips. Then pour in the melted butter and grind again.
2. Pour the prepared mass into a springform pan with an approximate diameter of 20 centimeters. Distribute the wet crumbs evenly over the entire area of the mold and compact it. It is convenient to use the flat bottom of a glass for this. Place the mold with the base in the refrigerator.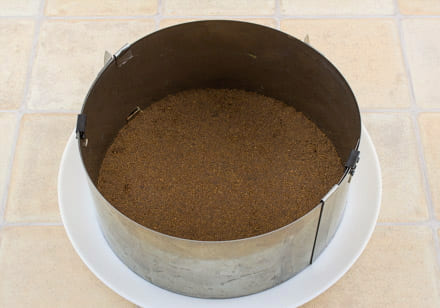
3. If frozen strawberries are used, they must be defrosted. Place the berries in a blender and grind them to a puree.
4. Rub the resulting puree through a fine sieve to remove seeds and make the texture of the future mousse smooth and uniform.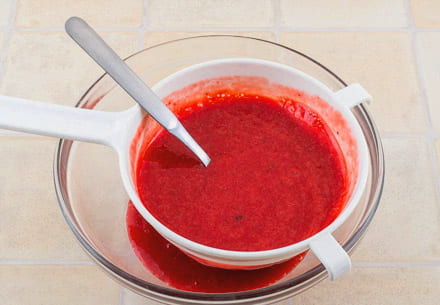
5. Divide the entire volume of the resulting puree into two parts. One of them will be used to prepare the mousse, the second – for the jelly. Pour the first half of the mousse puree into a bowl and add powdered sugar, lemon juice and mix. Place gelatin in a small container, pour 4 tbsp. water and leave for fifteen minutes to swell. After this, heat the gelatin on the stove with constant stirring. We do not allow boiling. All granules should dissolve. Cool the resulting liquid until warm and pour it into the strawberry mass.
6. Place the chilled cream in a bowl and beat it with a mixer at high speed until soft peaks form.
7.Gradually add the strawberry mixture with gelatin into the creamy foam. Gently mix with a spatula until smooth. We do not use a mixer at this stage. Taste the resulting cream: you may want to add more powdered sugar.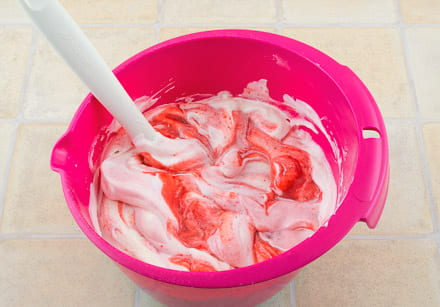
8. Take the mold with the base out of the refrigerator and place the strawberry mixture on the cookie layer, leveling it out. Place the mold back in the refrigerator for an hour until the mousse hardens.
9. Mix the second half of the strawberry puree for jelly with powdered sugar. Pour gelatin for jelly into 2 tbsp. water and leave to swell for 15 minutes, after which we heat it and dissolve it. Cool the resulting liquid slightly and add it to the strawberry puree. Remove the cake pan from the refrigerator and pour the strawberry jelly onto the mousse in an even layer. Place in the refrigerator for several hours so that the jelly layer hardens and the whole cake cools well.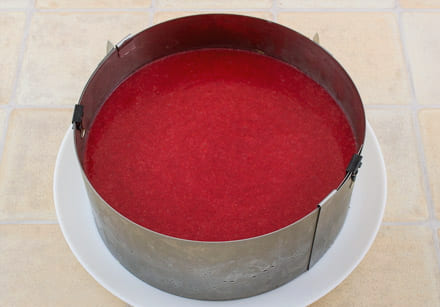
10. After the specified time has passed, take out the cake and open the mold ring. To avoid damaging the edges of the cake, you can heat the outer walls of the mold ring with a hairdryer - this will make it easier for them to move away from the delicate mousse. Whip the cream with powdered sugar until stiff peaks form. Place the resulting cream in a pastry bag with a nozzle and pipe rosettes around the circumference of the cake. Place strawberries on the surface of the rosettes. Keep the mousse cake in the refrigerator until serving.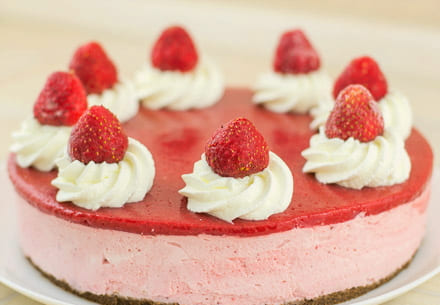
11. On the cut, the contrast of pink mousse, chocolate base and bright strawberry jelly looks very appetizing.
Bon appetit!
Mousse cake “Three chocolates” at home
This is the perfect cake for chocoholics! Each layer contains chocolate with a different percentage of cocoa, which causes the difference in their color and flavor.As a base, we prepare a chocolate sponge cake without flour - this will be the richest layer with a high percentage of cocoa content. It is similar to a soufflé and harmonizes perfectly with the subsequent less rich layers of mousse. It’s interesting to consider that in the end, more than half a kilogram of chocolate is “used” for such a cake. The finished dessert turns out to be quite satisfying, and its texture is similar to a cloud - delicate and light.
Cooking time: 60 min. excluding hardening time.
Cooking time: 50 min.
Servings: 6.
Ingredients:
- Chocolate 70% for the base – 180 gr.
- Butter for the base – 80 gr.
- Granulated sugar for the base – 80 gr.
- Eggs – 4 pcs.
- Instant coffee – 1 tsp.
- Cognac – 1 tbsp.
- Salt - a pinch.
- Chocolate 56% for the first mousse – 180 gr.
- Cream 30-33% for the first mousse – 300 gr.
- Butter for the first mousse – 30 g.
- Gelatin for the first mousse – ½ tsp.
- Powdered sugar for the first mousse – 1 tbsp.
- White chocolate for the second mousse – 180 gr.
- Cream 30-33% for the second mousse – 300 gr.
- Butter for the second mousse – 30 g.
- Gelatin for the second mousse – 1 tsp.
- Cream 30-33% for decoration – 100 gr.
- Powdered sugar for decoration – 3 tbsp.
- Chocolate dragee - for decoration.
- Cocoa powder for decoration – 1 tsp.
- Butter – for greasing the mold.
Cooking process:
1. Place instant coffee in a small container and add one teaspoon of hot water and stir.
2. Prepare the base: break 70% chocolate into pieces, place in a bowl and add butter to it.
3. Place the mixture of chocolate and butter in a water bath and melt with constant stirring. When a homogeneous smooth consistency is achieved, pour in the prepared coffee and cognac and mix well.
4.Break the eggs into a large bowl, add granulated sugar and salt and begin beating at medium speed, gradually increasing the speed. We work for about five to seven minutes until the mass becomes thick and fluffy.
5. Add the melted chocolate mass to the resulting egg foam and mix everything together.
6. Achieve uniformity, but at the same time stir with gentle circular movements to prevent the airy texture from settling.
7. Cover the bottom of a springform cake pan with a diameter of 22 centimeters with a circle of oiled parchment. Grease the inner sides with a thin layer of butter. Pour the prepared dough into the mold and level the surface.
8. Heat the oven to 170 degrees and place the mold with chocolate dough on a medium level. Baking time – 25 minutes. You will be able to observe that in the oven the dough will first rise and then settle at room temperature. Let the finished chocolate soufflé cool right in the mold.
9. To prepare the first mousse, place 56% chocolate and butter in a bowl.
10. Place the bowl in a water bath and melt the chocolate and butter until smooth and homogeneous.
11. Mix the chilled cream with powdered sugar and beat until stiff peaks form. As soon as the cream thickens, stop whipping so as not to beat the cream.
12. Pour gelatin into 2 tbsp. water and leave to swell, then heat and dissolve. Add melted chocolate and butter to the buttercream in parts, mixing both masses with a mixer at low speed. Pour in warm gelatin in a thin stream. If the mass turns out to be too thick, you can add a couple of tablespoons of milk.
13. Place the prepared mixture on top of the base directly into the mold.Tap the bottom of the pan on the table a couple of times to level the layer and remove large air bubbles. Place the mold in the refrigerator to harden the first mousse.
14. By analogy with the first, prepare the second mousse. Place the broken white chocolate and butter into a bowl. Melt the ingredients until smooth in a water bath. Pour gelatin in the specified amount into 3 tbsp. water, let it swell for 15 minutes and then dissolve the granules when heated. Let the resulting liquid cool to a warm state.
15. Whip the chilled cream into a thick foam. We do not use powdered sugar for the second mousse, since white chocolate has a high degree of sweetness.
16. Add melted white chocolate and butter to the whipped cream and mix carefully with a spatula. Then pour in the gelatin and mix again. We take out the mold with the cake preparation from the refrigerator and spread the prepared cream on top of the frozen first mousse. Return the mold to the refrigerator for several hours - all layers should cool well and harden.
17. To carefully remove the finished cake from the mold, use a hairdryer to heat the sides from the outside. Then carefully open the ring - the walls of the cake should easily separate.
18. To decorate, sprinkle the surface of the white layer with cocoa powder through a fine sieve. Whip the cream with powdered sugar until thick and place the cream in a pastry bag with a nozzle. We plant voluminous rosettes on the surface of the cake sprinkled with cocoa. Place a small chocolate dragee in the center of each rosette.
19. Be sure to store the cake in the refrigerator until serving - this will keep its delicate texture in perfect condition. To ensure that the portion pieces are cut beautifully and not smeared, use a warm knife.
Bon appetit!
Mousse cake recipe from Andy Chef
Mousse cakes according to Chef Andy’s recipes are always something fabulously beautiful, tasty and perfect. The author’s technique for making desserts and meticulous approach to the process is simply amazing. Using this recipe, we prepare a gorgeous mousse cake with the addition of champagne, tangerines and mangoes. It takes time and care to prepare, but the results are definitely worth it.
Cooking time: 2 hours. excluding freezing time.
Cooking time: 1 hour 30 minutes.
Servings: 6.
Ingredients:
- Eggs for sponge cake – 2 pcs.
- Granulated sugar for biscuit – 20 gr.
- Cream 30-33% for sponge cake – 50 g.
- Biscuit flour – 50 gr.
- Leaf gelatin for mango layer – 4 g.
- Mango puree – 220 gr.
- Granulated sugar for the mango layer – 30 g.
- Corn starch for mango layer – 6 g.
- Butter for the mango layer – 55 g.
- Tangerines – 200 gr.
- Leaf gelatin for tangerine layer – 4 g.
- Champagne – 110 gr.
- Sheet gelatin for mousse with champagne – 7 g.
- Yolk for mousse with champagne – 20 g.
- Granulated sugar for mousse with champagne – 40 gr.
- Water for mousse with champagne – 15 g.
- Cream 30-33% for mousse with champagne – 80 g.
- Sheet gelatin for glaze – 10 g.
- Water for glaze – 55 g.
- Granulated sugar for glaze – 130 gr.
- Glucose syrup 43% for glaze – 130 gr.
- White chocolate for glaze – 165 gr.
- Cream 30-33% for glaze – 85 gr.
- Kandurin dye – 10 g.
Cooking process:
1. Divide the eggs into yolks and whites. Immediately place them in separate containers. Pour half of the specified amount of sugar into the yolks, and the rest of the sand into the whites. Using a mixer at high speed, immediately beat the egg whites until they form a stable, dense foam. Then we move on to beating the yolks - you need to work until they whiten and thicken.
2.Add cream and sifted flour to a container with whipped yolks.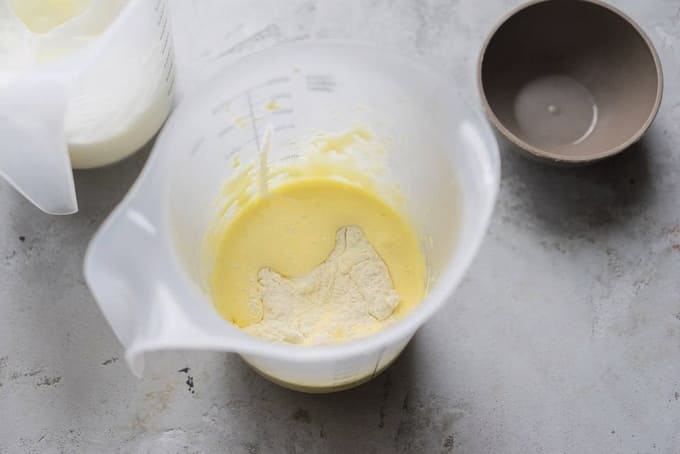
3. Beat with a mixer and get a yellow viscous mass.
4. Place the previously whipped whites into this mixture and mix everything together with a silicone spatula.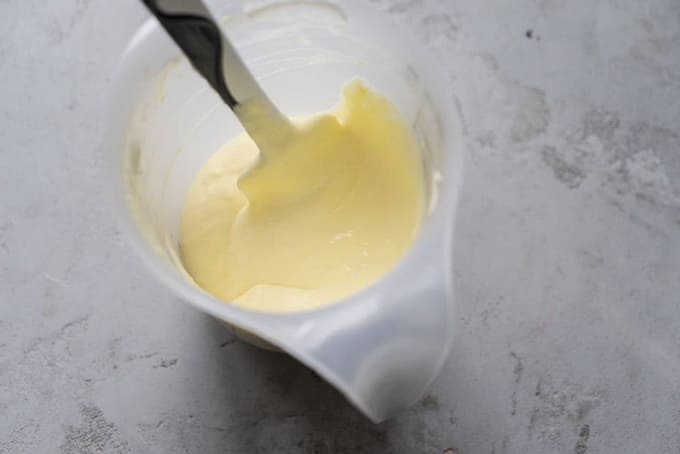
5. Cover the baking sheet with oiled parchment or a silicone mat. Spoon the prepared dough into cooking rings with a diameter of 18 centimeters. If there are no rings, then you can bake cakes of arbitrary diameter, and then cut out even round pieces of the desired size.
6. Place the baking sheet with the dough in an oven preheated to 160 degrees on the middle level. Heating mode – top and bottom. Bake for 10-13 minutes until the cakes are firm and springy. After baking, remove the rings, turn the biscuit upside down and let it cool.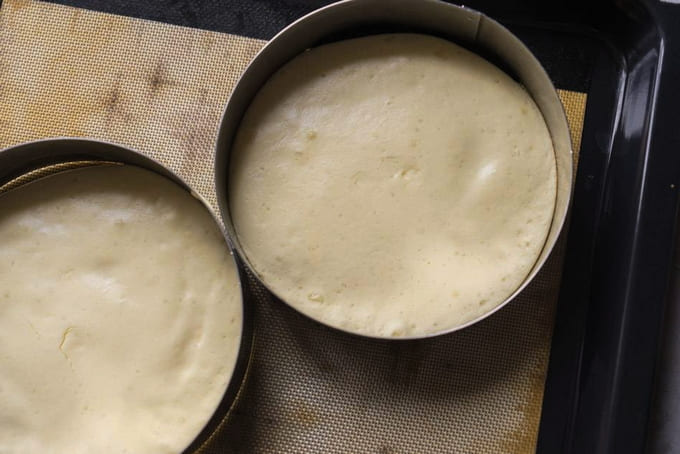
7. Prepare the mango layer. To do this, immediately soak the leaf gelatin in a small amount of very cold water.
8. Mix granulated sugar and cornstarch in a glass.
9. Place mango puree in a saucepan and heat until very hot. Gradually pour the mixture of sugar and starch into the puree, constantly stirring with a whisk. Remove from the stove.
10. The mixture should thicken and become homogeneous.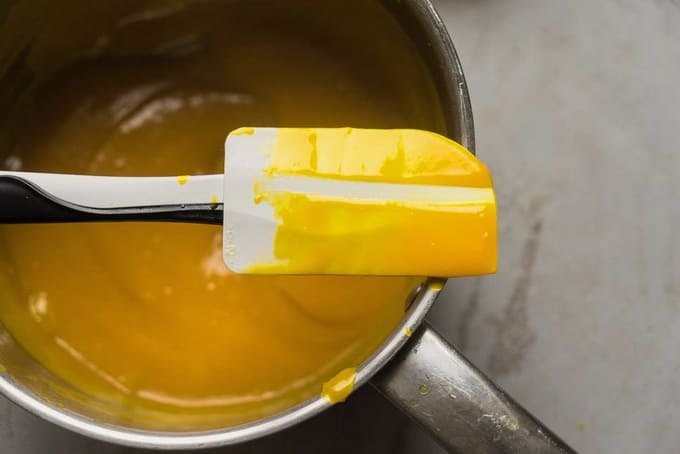
11. Squeeze the gelatin sheet with your hands and add to the mango mixture. Stir until the gelatin is completely dissolved.
12. Then add butter to the mango mixture and knead until smooth. Let the finished mixture cool at room temperature.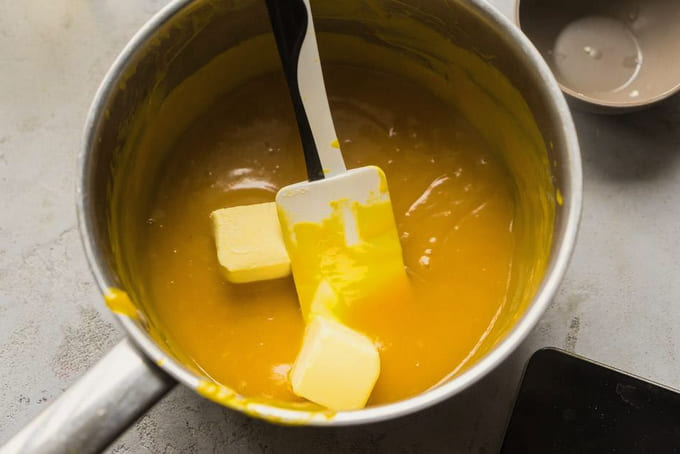
13. Let's move on to preparing the tangerine layer. Immediately pour the indicated amount of gelatin with cold water in a small amount. Leave to swell. We peel the tangerines, and remove the white films and seeds from the citrus slices.
14. Cut the resulting tangerine pulp into small pieces and place in a saucepan.Place it on the stove and heat the citruses to a light boil.
15. Squeeze the previously soaked gelatin from the water and add to the tangerines in the saucepan. Remove the container from the stove and stir well until the gelatin dissolves. Let the finished mixture cool.
16. We begin assembling the cake. To do this, we use a high culinary ring with a diameter of 16 centimeters. Cover its bottom with cling film.
17. If the boots of the ring are not high enough, you can additionally line the edges with a strip of dense material (film, foil) along the inner circumference. Cut the cooled biscuits to the size of the mold at 16 centimeters. This is necessary in order to remove the edges that have dried out during baking. Place the circle of biscuit in the ring.
18. Place the cooled mango mixture on the sponge cake and immediately put the mold in the freezer until the surface of the mango layer hardens. Do not keep the product until it is completely frozen.
19. We begin preparing the champagne mousse. Place the specified amount of granulated sugar and water in a saucepan. Heat the mixture on the stove to a boil and cook until the syrup begins to thicken and form large bubbles (121 degrees), then remove it from the stove. Soak leaf gelatin in cold water.
20. Place the yolk in a whipping container and start working with the mixer until a homogeneous mass is obtained. Then pour the hot syrup into the yolk foam in a thin stream, without stopping whisking.
21. The mass will increase in volume and become noticeably lighter.
22. We remove the gelatin from the water by hand and put it in the saucepan in which the syrup was boiled - the residual heat of the dish will melt the gelatin. Pour the gelatin into the yolk-syrup mixture and beat for a minute at high speed.
23. Pour in the champagne, without stopping whisking, and continue working for another minute.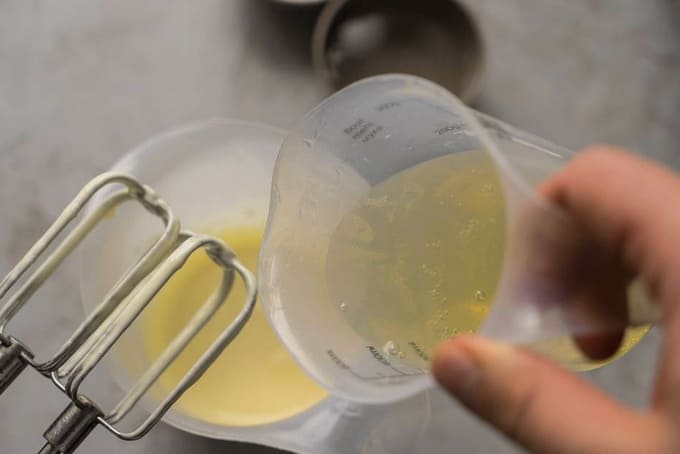
24.In a separate container, whip the cream into a thick foam.
25. Now pour the prepared mixture with champagne into the whipped cream and mix both masses well with a silicone spatula. The finished mousse should be quite dense.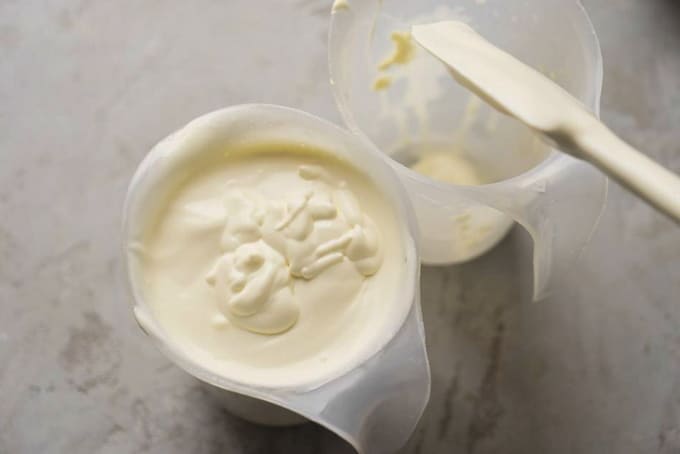
26. Final assembly of the cake. For it you need a culinary ring with a diameter of 18 centimeters or a silicone mold, as in the photo, with a diameter of 16 centimeters. Place the prepared mousse in this form or ring and use a spatula to lift the mass along the inner sides.
27. We take the frozen piece out of the freezer and place it in the mousse in the mold.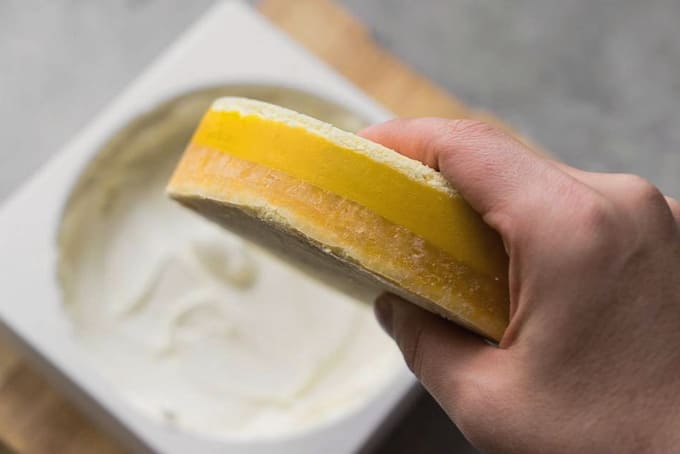
28. The workpiece should “drown” slightly in the mousse. Place the formed cake in the freezer and keep it there for five to six hours.
29. To prepare the glaze, mix water, granulated sugar and glucose syrup in a saucepan. Heat the mixture to a boil and cook it until it reaches 103 degrees. At this stage it is convenient to use a needle thermometer.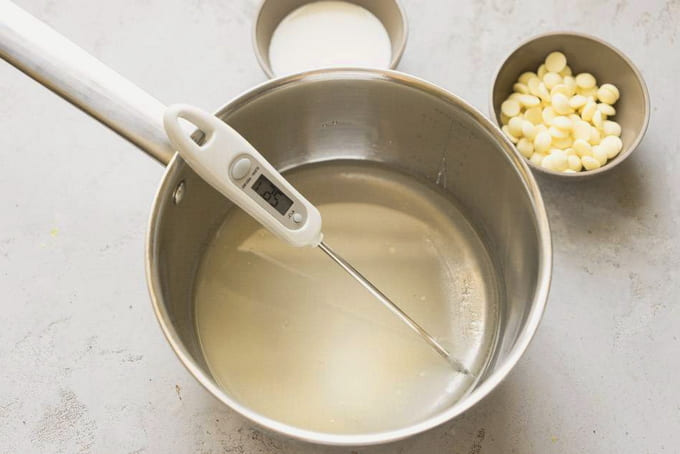
30. Place white chocolate in a small container.
31. Pour hot syrup into the chocolate.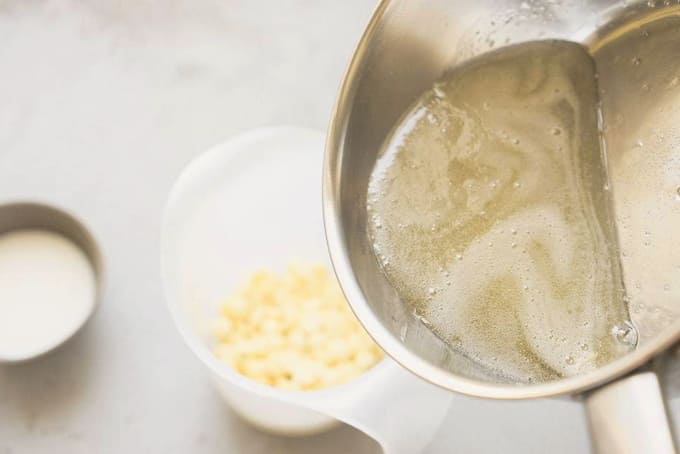
32. Soak the leaf gelatin in cold water, then squeeze it out with your hands and add it to the container with the chocolate and syrup. Mix well.
33. Pour cream into the mixture and mix.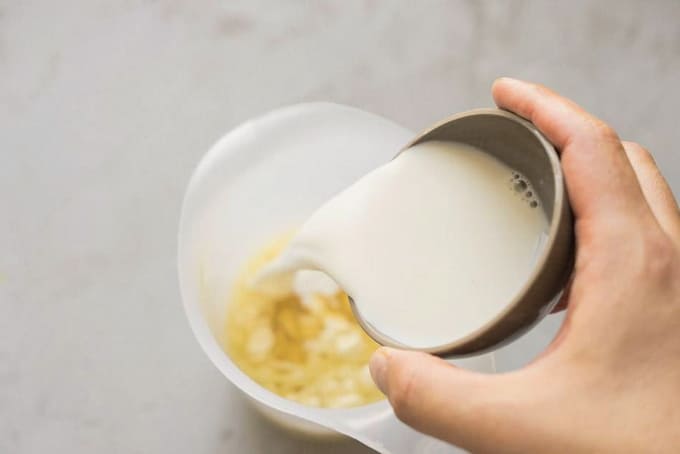
34. Blend the mixture with an immersion blender for one to two minutes until completely smooth and homogeneous.
35. Pour the dye into the mixture and mix with a blender. Cool the prepared glaze.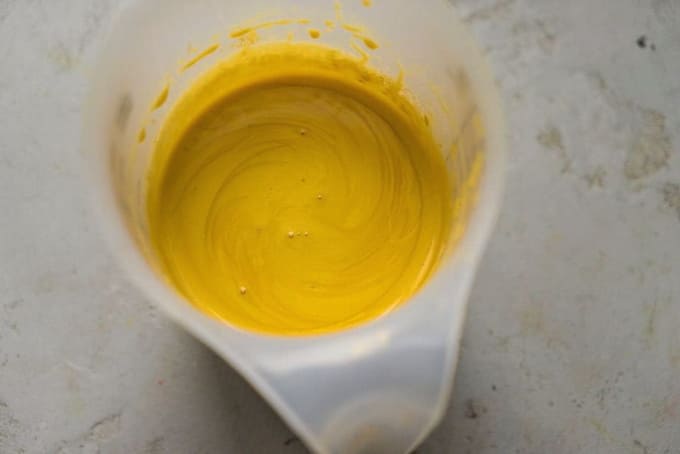
36. After the specified time has passed, remove the cake from the mold.
37. Place the glass on the baking sheet, rather than placing the cake itself on it. Cover the cake with the prepared glaze. Level the surface with a spatula. The cake is ready! If desired, you can decorate its surface to your own taste, or leave it as is. Place the cake in the refrigerator until ready to serve.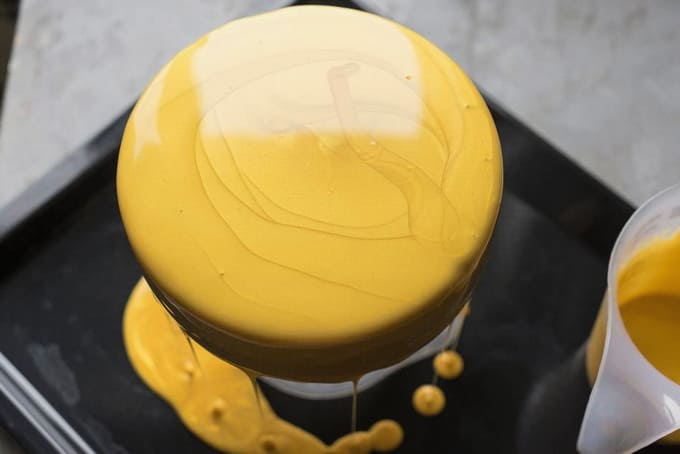
38.To prevent the cut of the cake from becoming smeared when cutting into portions, use a heated, dry knife.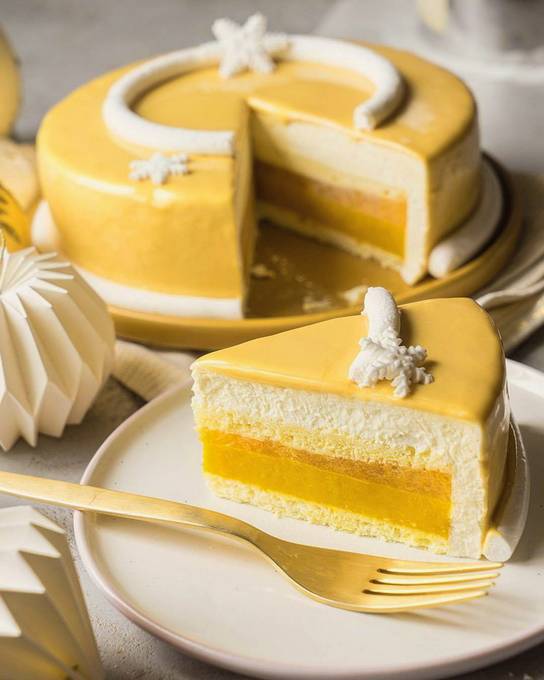
Bon appetit!
Homemade mango-passion fruit mousse cake
This cake will amaze with an explosion of flavor combinations and will not leave anyone indifferent. Delicate passion fruit mousse is framed with airy chocolate cream, and the base of the cake is a chocolate sponge cake. The jelly on the surface looks very juicy and elegant. Cutting the cake immediately prompts you to take a sample and figure out how many layers there are and what kind of filling was used. Making such a cake is truly a creative process.
Cooking time: 1 hour 20 minutes. excluding hardening time.
Cooking time: 1 hour.
Servings: 6.
Ingredients:
- Eggs for sponge cake – 1 pc.
- Granulated sugar for biscuit – 25 gr.
- Biscuit flour – 25 gr.
- Cocoa powder for biscuit – 10 g.
- Salt for biscuit - a pinch.
- Baking powder – ½ tsp.
- Mango puree – 200 gr.
- Water for mango jelly – 35 ml.
- Instant gelatin for mango jelly – 7 g.
- Granulated sugar for mango jelly – 2 tbsp.
- Passion fruit juice – 50 ml.
- Instant gelatin for passion fruit mousse – 4 g.
- Sugar for passion fruit mousse – ½ tbsp.
- Cream 30-33% for passion fruit mousse – 100 g.
- Dark chocolate for chocolate mousse – 200 gr.
- Cream 30-33% for chocolate mousse – 400 ml.
- Instant gelatin for chocolate mousse – 9 g.
- Water for chocolate mousse – 45 g.
- Granulated sugar for chocolate mousse – 50 gr.
- Egg yolks for chocolate mousse – 3 pcs.
- Cream 30-33% for decoration – 100 ml.
- Dark chocolate for decoration – 50 gr.
- Mango puree for decoration – 70 gr.
- Passion fruit puree for decoration – 50 gr.
- Instant gelatin for decoration – 3 g.
- Water for decoration – 15 ml.
- Granulated sugar for decoration – 1 tbsp.
- Butter - for greasing the pan.
Cooking process:
1.To prepare the biscuit, combine the egg with salt and granulated sugar. Beat with a mixer at high speed until fluffy.
2. Sift flour, baking powder and cocoa powder over the beaten egg-sugar mixture. Knead the dough using a spatula, making gentle circular movements.
3. Pour the dough into a round pan greased with butter. The optimal diameter of the mold is 16 centimeters. Bake the cake in an oven preheated to 180 degrees on a medium level. Baking time is approximately 15 minutes. Check readiness with a toothpick. Remove the finished biscuit from the mold and cool.
4. Let's move on to preparing mango jelly. Mango puree, by the way, can be found in the baby food section. Place the gelatin for the jelly in a small container and fill it with water in the specified amount. Leave to swell according to instructions.
5. Place mango puree in a saucepan, combine with granulated sugar and heat until hot.
6. Add the swollen gelatin to the hot mango mass and stir everything together until the gelatin is completely dissolved.
7. Pour the resulting mass into a cooking ring also 16 centimeters in diameter and place it in the freezer. Let the layer dry completely.
8. The next step is preparing the passion fruit mousse. Immediately pour the gelatin with the specified volume of water and leave to swell. Mix passion fruit juice with granulated sugar. We send the swollen gelatin to the juice and place the container in a water bath. Stir until the gelatin is completely dissolved. Cool until warm.
9. Whip the cream for the mousse until stiff peaks form and pour in the passion fruit and gelatin mixture. Beat everything together at medium speed until completely mixed.
10.We take the ring with frozen mango jelly out of the freezer and spread the resulting mousse of cream and passion fruit on it. Level the surface and return to the freezer. Let the workpiece harden well.
11. We begin preparing the chocolate mousse. Fill the gelatin with water and leave to swell.
12. Place the yolks in a bowl, add granulated sugar and grind until smooth.
13. Place the bowl with the yolk-sugar mixture in a water bath and heat until the sugar grains are completely dissolved. Don't forget to stir with a whisk all the time.
14. Remove the bowl with the yolk mixture from the water bath and add gelatin. Stir well with a whisk until smooth. Let the mixture cool to room temperature.
15. Break the chocolate for the mousse into pieces and place in a bowl. Place the bowl in a water bath and melt the chocolate until smooth. Then cool the mass to a slightly warm temperature.
16. Whip the cream for the mousse until thick foam and add melted chocolate to it. Mix everything together with a mixer at medium speed.
17. Next, add the cooled yolk mixture to the chocolate-cream mixture and beat everything together well. Pour the resulting cream into a pastry bag.
18. Now let's assemble the cake. For assembly we use a mold with a diameter of 18 centimeters. Immediately place the chocolate biscuit in the mold.
19. Next, take a bag of chocolate mousse, cut off a corner and carefully fill the space at the bottom of the mold between the sponge cake and the walls. Then make a one-centimeter layer of mousse on the surface of the cake.
20. Take out the frozen mango jelly and passion fruit mousse mixture and place it in the center of the mold on top of the chocolate mousse.
21.With the remaining chocolate mousse in the pastry bag, fill the space between the walls of the mold and the sides of the workpiece, and also form a high surface layer. Level it with a spatula. Place the cake pan in the refrigerator for five to six hours to allow the dessert to cool completely.
22. To prepare the decor, pour gelatin with water and leave to swell. Place mango and passion fruit puree into a saucepan and add granulated sugar. We put it on the stove. While stirring, heat the mixture until hot and the sugar crystals dissolve. Then remove the saucepan from the stove and add gelatin. Stir vigorously until smooth and let cool until warm.
23. Pour the prepared jelly onto the surface of the cake and put the dessert in the refrigerator. The jelly should harden completely.
24. Melt the chocolate for decoration in a water bath and let the mixture cool to a slightly warm state.
25. Whip the cream for decoration into a thick foam and add melted chocolate. Beat everything together for a couple more minutes - the cream should be stable.
26. Place the cream in a pastry bag with a nozzle and pipe voluminous rosettes along the edges of the cake. The cake is ready. Place it in the refrigerator until serving.
27. To ensure that portioned pieces of cake have a beautiful, clear cut, cut the dessert with a hot, dry knife.
Bon appetit!
Delicious raspberry mousse cake recipe
Mousse cakes require a huge variety of combinations of different ingredients, types of bases and execution techniques. There are complex options with step-by-step assembly of the dessert, and there are also very simple and fairly quick recipes. This one is one of those. We will use Savoiardi sponge sticks as a test base - their porous, airy structure goes perfectly with the delicate mousse.And we prepare the mousse itself with aromatic raspberries - it turns out unsweetening, refreshing, with a soft creamy tint. This mousse cake doesn’t take much time to prepare – it’s a great option if you want to try your hand at creating a modern, trendy dessert.
Cooking time: 60 min. excluding cake hardening time.
Cooking time: 40 min.
Servings: 6.
Ingredients:
- Raspberries – 600 gr.
- Granulated sugar for raspberry puree – 80 gr.
- Granulated sugar for syrup – 1.5 tbsp.
- Gelatin – 12 gr.
- Cream 30-33% - 250 ml.
- Savoyardi cookies – 20 pcs.
- Orange – 1 pc. medium size.
Cooking process:
1. First, let's prepare the impregnation for the cookies. To do this, wash the orange with hot water, dry it and remove the zest from it with a fine grater or a special knife. In a thick-bottomed saucepan, mix granulated sugar for syrup and one and a half tablespoons of water. Place the container on the stove and heat the syrup. Add orange zest, stir and bring to a boil. Cook the mixture until the syrup begins to thicken slightly. Remove the saucepan from the stove and let the zest in the syrup cool so that it releases as much of its citrus aroma as possible into the sweet liquid.
2. To decorate the cake, it is convenient to use a rectangular mold measuring 12 by 26 centimeters. The size and shape may, of course, vary. Then the height and overall appearance of the finished cake will differ from what is shown in the photo. We line the inner walls of the mold with cling film - this will make it easier to remove the cake later. Lightly brush the savoiardi sticks with citrus syrup on the dry side. We lay them out along the wall, turning the soaked side inward and the sugar side outward. To decorate the bottom of the stick, cut it to the desired size. Soak the sugar side in syrup and place it inside.Save the remaining zest in the syrup for serving.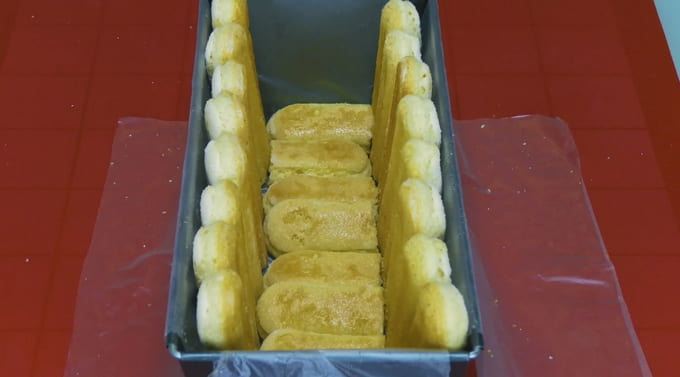
3. Pour gelatin into 1/3 cup of cold water and leave to swell, according to the instructions. Next we work with berries. If the raspberries are frozen, be sure to defrost them. Puree the berries with an immersion blender. We rub the resulting puree through a fine sieve to achieve homogeneity and a silky texture for the future mousse. Add granulated sugar to the mashed puree and stir until the sugar crystals dissolve. Set aside a couple of tablespoons of puree to decorate and serve the finished cake. Heat the swollen gelatin to a homogeneous liquid state and pour it into the main mass of the puree, mix well.
4. Pour well-chilled cream into a cold bowl and beat with a mixer at high speed until stable peaks form. If possible, it is better to place the bowl of cream on ice or immerse it in another larger container with water and ice. This will make whipping more effective and the creamy foam will be denser.
5. Add raspberry puree with sugar and gelatin to the whipped cream, stir until completely combined. Spread the resulting mousse onto savoiardi sticks in the mold. You can place pieces of cookies in the middle of the mousse in a chaotic order - they will be visible on the cut of the cake.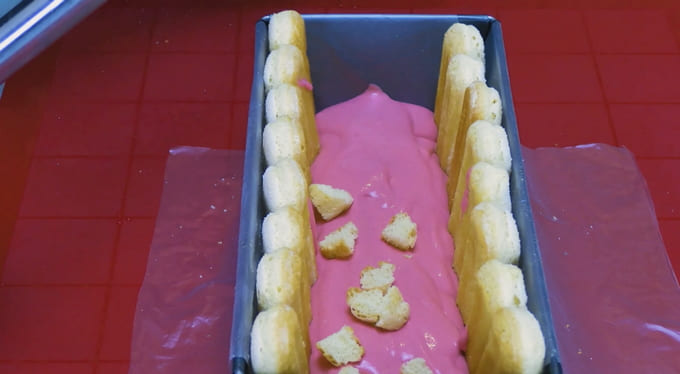
6. Formation of the cake is finished. We put the dessert in the refrigerator and leave it for five to six hours so that the mousse completely hardens. Before serving, pull the edges of the film up and remove the frozen cake. Transfer to a serving platter and garnish with the reserved raspberry puree and orange zest from the syrup.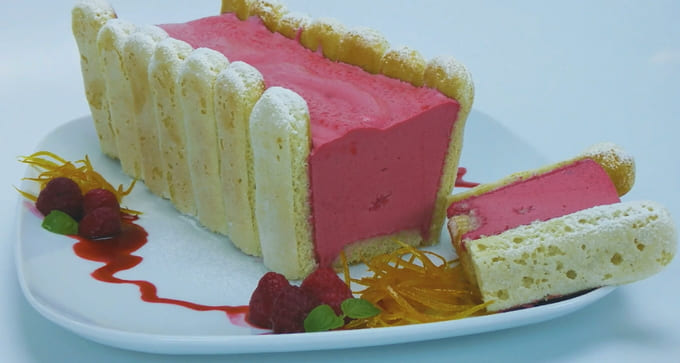
Bon appetit!
Step-by-step recipe for making sponge-mousse cake
A very tender, airy cake with porous sponge cake layers and a melt-in-your-mouth mousse layer of berries.This weightless dessert simply can’t help but arouse interest – the striped mousse pieces just beg to be tasted. To highlight the refreshing berry mousse, we will prepare a sweet cream based on condensed milk with the addition of lemon juice to cover the cake - citrus notes fit very well into the overall flavor composition and magically change the mood of the dessert.
Cooking time: 1 hour 15 minutes. excluding hardening time.
Cooking time: 60 min.
Servings: 6.
Ingredients:
- Eggs – 3 pcs.
- Water – 5 tbsp.
- Granulated sugar – 260 gr.
- Flour – 8 tbsp.
- Baking powder – 10 gr.
- Berry syrup – 4 tbsp.
- Condensed milk – 170 gr.
- Sour cream 20% - 120 gr.
- Lemon – ½ pc.
- Red currants – ¾ tbsp.
- Black currant – ¾ tbsp.
- Powdered milk – ½ tbsp.
- Berry yogurt – 180 gr.
- Cottage cheese – 100 gr.
- Gelatin – 13 gr.
- Vegetable oil - for greasing the mold.
- Coconut flakes – 1 tbsp.
- Mint – 1 branch.
Cooking process:
1. To prepare the sponge cake, break the eggs and separate the whites from the yolks.
2. Place the yolks in a bowl, add 4 tbsp to them. granulated sugar from the total amount and begin to beat with a mixer at high speed until you get an almost white air mass. Pour in water in the specified amount, without stopping whisking - the foam will become a little thinner.
3. Beat the whites in a separate container until stiff foam. Add 4 tbsp to them. granulated sugar from the total amount and continue beating until the sugar crystals dissolve.
4. Sift the flour together with baking powder. Mix the beaten yolks with the sifted dry mixture, making gentle circular movements. We try to stir all the lumps.
5. Add the whipped whites into the resulting dough in parts.Mix carefully, trying not to precipitate the airiness of the dough.
6. For baking, use a round springform cake pan with a diameter of 20 cm. Cover the bottom of the pan with parchment. Lubricate the bottom and inner surface of the sides with a thin layer of vegetable oil.
7. Place the biscuit dough into the prepared pan. Place it in an oven preheated to 180 degrees on a medium level. Baking time is approximately twenty-five minutes. At the end, check the readiness with a match or toothpick.
8. Take the finished sponge cake out of the oven, remove it from the mold, remove the parchment from the bottom. Let the baked goods cool. Then cut into two even layers. If the center has risen during baking, cut it down to a flat surface. Soak the cakes with berry syrup. Wash the used baking dish and wipe dry. Place the top of the biscuit back into the pan, cut side up.
9. Prepare berry mousse. If the berries are frozen, be sure to defrost them before cooking and drain the excess liquid. Puree the berries using a blender. Add half a glass of granulated sugar from the total amount, berry yogurt, cottage cheese and milk powder to the resulting puree. Blend everything together with a blender until smooth. Soak the gelatin in ¼ cup of cold water and leave to swell, according to the instructions on the package. Then we heat it until the granules are completely dissolved and pour the resulting liquid into the berry mixture. Beat everything together with a mixer for one or two minutes. Place the prepared mousse in the refrigerator for five to ten minutes to begin stabilizing.
10. Assembling the cake. Place 2/3 of the berry mousse on the first layer of sponge cake and level it out.Place the second sponge cake cut side down and press lightly to ensure an even position. Spread the rest of the mousse on top and smooth the surface with a spatula. Place the cake pan in the refrigerator for a couple of hours - the mousse should harden.
11. Prepare the cream for coating. Wash the lemon with hot water to enhance juice secretion. Squeeze the juice from half the citrus and strain it. In a bowl, mix condensed milk and sour cream. Beat the mixture with a mixer at high speed for a couple of minutes. Then add lemon juice and continue beating at low speed until the cream begins to thicken. Let the finished cream stand in the refrigerator for fifteen to twenty minutes to stabilize.
12. Cover the cooled cake with an even layer of prepared cream on all sides. Place the dessert in the refrigerator for half an hour.
13. Take out the dessert and decorate the surface with fresh berries and mint leaves. Sprinkle the space around the berries and the sides of the cake with coconut flakes.
14. Keep the cake in the refrigerator until serving.
15. To ensure that the portion pieces have a clear pattern, cut the cake with a heated dry knife.
Bon appetit!
Homemade mousse cake with cherries
It's amazing how a light, airy dessert can have such a pronounced richness of flavor. The mousse cake literally melts in your mouth, leaving behind a bright aftertaste of chocolate and cherries. This pastry will definitely appeal to both avid chocoholics and lovers of berry desserts. A piece of such a cake seems like the ideal end to a festive dinner - it will not weigh down an already full stomach, but will complement the meal with a final sweet chord.
Cooking time: 1 hour 30 minutes.
Cooking time: 55 min.
Servings: 12.
Ingredients:
- Flour – 250 gr.
- Baking powder – 1 tsp.
- Granulated sugar for dough – 150 gr.
- Cocoa powder for dough – 30 g.
- Salt for dough - a pinch.
- Egg yolks – 2 pcs.
- Butter – 150 gr.
- Bitter chocolate – 300 gr.
- Leaf gelatin – 3 sheets.
- Egg whites – 2 pcs.
- Granulated sugar for mousse – 200 gr.
- Cream 30-33% for mousse – 450 ml.
- Salt for dough - a pinch.
- Cocoa powder for mousse – 2 tbsp.
- Vanilla extract for mousse – ½ tsp.
- Cherry – 200 gr.
- Granulated sugar for topping – 50 gr.
- Starch for topping – 1 tbsp.
- Grated chocolate – 2-3 tbsp.
- Vegetable oil - for greasing the mold.
Cooking process:
1. Prepare the dough for the crust. In a wide bowl, mix flour, cocoa powder, granulated sugar, salt and baking powder. Cut the cooled butter into cubes and add to the dry mixture. Chop into crumbs. Add egg yolks to the resulting crumbs and knead the dough.
2. Grease a detachable round mold with a diameter of 26 centimeters with a thin layer of vegetable oil. We spread the prepared dough and level it over the entire area of the bottom of the mold. Preheat the oven to 200 degrees and place the pan with the dough in it on a medium level. Bake for twenty minutes.
3. Take the finished cake out of the oven and let it cool. Remove it from the mold and place it on a flat dish. Wash the edge of the mold and wipe it dry. We place it around the cake on a dish - this will be a limiting form for the mousse.
4. Place the whites in a bowl and beat them until stiff foam. Then add 50 grams of sugar and salt, continue beating until the sugar crystals dissolve.
5. Break the dark chocolate into small pieces, place them in a bowl and heat them in a water bath until liquid.Add 150 grams of sugar and the specified amount of cocoa powder to the melted chocolate and mix everything thoroughly until smooth.
6. Whip the chilled cream until thick foam. Pour in vanilla extract and mix it with the creamy mixture.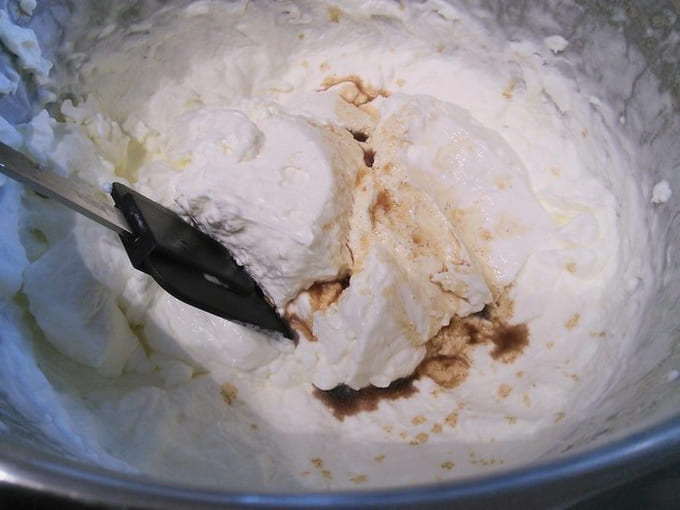
7. Pour the chocolate mixture into a large bowl. Add a third of the total amount of whipped cream to it and stir well.
8. Pour gelatin with a small amount of cold water and leave to swell. Then squeeze out the gelatin sheets, put them in a saucepan, pour in 2 tbsp. water and heat until dissolved. We do not allow boiling. Cool the resulting liquid and pour it into the chocolate-cream mixture.
9. Add the rest of the whipped cream, gently folding it into the total mass.
10. Lastly, add the whipped whites in parts, mixing them with the main mass using gentle circular movements. The mousse turns out quite thick.
11. Place the prepared chocolate mousse on top of the cake, enclosed in a ring on a platter. We put the future cake in the refrigerator for an hour or two so that the mass hardens.
12. If the cherries are frozen, be sure to defrost them before cooking. Drain off excess juice. Place the berries in a saucepan and add sugar. Heat the cherries on the stove until almost boiling, stirring constantly. We dilute starch in 2 tbsp. cold water and pour this liquid into the hot cherry mixture. Actively stir the resulting topping, without bringing it to a boil, and remove from the stove. Let the topping cool.
13. Take the cake out of the refrigerator and remove it from the ring. To make it easier to separate the dessert, carefully run a thin knife between the cake and the inner walls of the ring.
14.We spread the cherry topping on the surface of the mousse - it immediately begins to set on the cold surface of the cake.
15. Sprinkle some grated chocolate on top of the topping for decoration. Cool the cake in the refrigerator for another half hour to an hour and serve. To ensure an even and clear cut of the dessert, cut it with a heated, dry knife.
Bon appetit!


