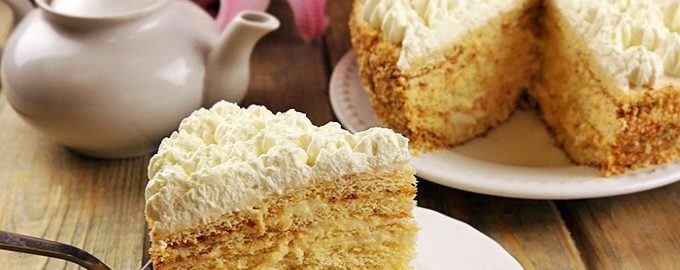
The “Milk Girl” cake is a pastry that is popular among many chefs because it is prepared from simple ingredients at home, and the result is liked by absolutely all lovers of high-calorie, juicy desserts. The cake was invented in Germany in the last century, where condensed milk of the same name from Nestlé was sold everywhere. This is precisely the main ingredient of the Milk Girl cake.
- Cake “Milk Girl” - a classic recipe at home
- Cake “Milk Girl” with cream cheese cream
- A simple and delicious recipe for “Milk Girl” with ice cream
- Cake “Milk Girl” with curd cream
- Milk Girl recipe from Andy Chef
- Recipe for "Milk Girl" cake from Grandma Emma
- Cake “Milk Girl” - recipe from Olga Vashurina
- A simple and delicious recipe for “Milk Girl” with fruits
- How to make “Milk Girl” cake with mascarpone?
- “Milk girl” with sour cream at home
Cake “Milk Girl” - a classic recipe at home
The “Milk Girl” cake according to the classic recipe is best baked the way it was originally prepared in its homeland, Germany. Thin biscuit cakes based on condensed milk were generously soaked in thick buttercream, and as a result, a beautiful, snow-white, moderately high-calorie dessert appeared on the table. So if you like condensed milk and cream, then the German “Milch Mädchen” is definitely your sweet option!

- For the test:
- Condensed milk 1 jar
- Baking powder 10 (grams)
- Chicken egg 2 (things)
- Flour 140 (grams)
- For cream:
- Cow's milk 300 (milliliters)
- Butter 70 (grams)
- Cream 150 gr. (33%)
- Flour 1 tbsp with a slide
- Granulated sugar 100 (grams)
- Potato starch 2 (teaspoons)
-
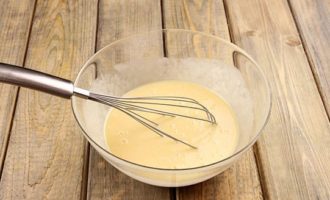
How to prepare a 1.5 kg “Milk Girl” cake at home according to the classic recipe? Whisk the condensed milk with the eggs until smooth using a whisk or mixer.
-
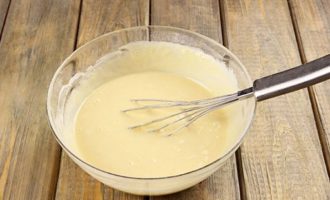
Sift the flour into a bowl along with the baking powder and add it to the egg-milk base of the dough. Using a whisk or mixer, beat the dough until you get a homogeneous, moderately thick mixture.
-
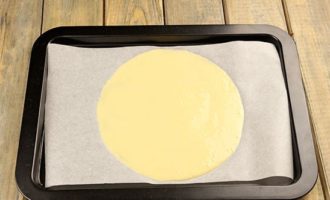
To draw a cake pan, take baking paper and something large and round, for example a lid with a diameter of 20-22 cm. Turn the paper over with the pattern down - it will show through. To prevent the cake from sticking, if your paper is not oiled, grease it with a little oil. Spread the dough around with a spoon, scooping out 2-3 tablespoons. Do not go beyond the circle, distribute the dough evenly.
-
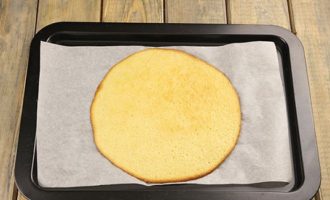
Heat the oven to 180-190 degrees, bake the cakes until golden brown, remove from the sheet while hot and place to cool on a flat surface.
-
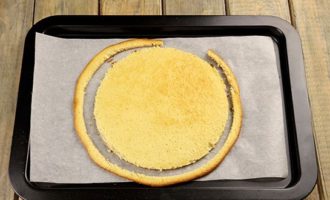
While the cake is still hot, you can trim the edges to give the cake a more even appearance. You should end up with 6-7 cakes.
-
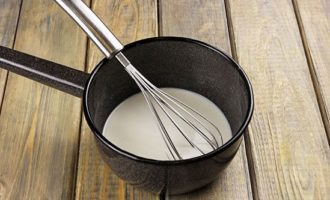
Prepare the cream. Pour half a glass of milk into a saucepan or saucepan, add starch and flour, stir.
-
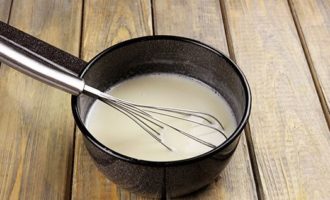
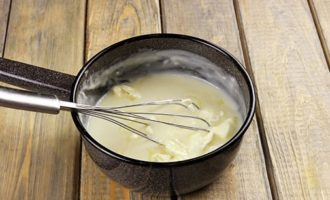
Add sugar, remaining milk, place the mixture on low heat. Cook the cream until thick, stirring so as not to burn. Remove the cream from the heat as soon as it starts to boil.
-
Let the cream cool under the lid so that it does not become covered with a film on top.Add butter, softened at room temperature, to the cream and mix thoroughly with a whisk, whisking it. This can also be done with a mixer.
-
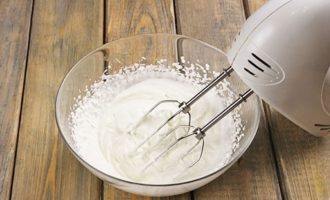
Whip the cream until thick foam appears; it should be cold.
-
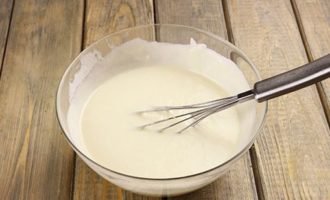
Using a whisk or mixer, combine the cream with the custard until you have a single, smooth, thick cream.
-
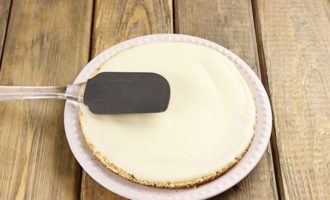
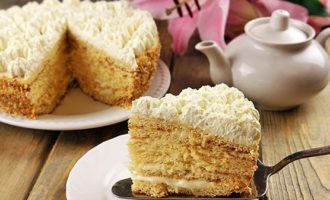
Assemble the cake on a flat plate, brushing the cakes generously with cream.
-
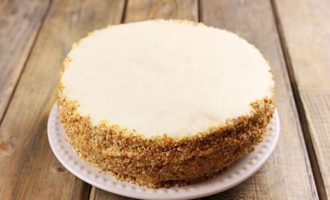
To ensure that the cake is well soaked and beautiful, do not skimp on the cream on the sides of the cake and its top. Dry the cake scraps in the oven and crush them into crumbs, sprinkle the sides of the cake with it.
-
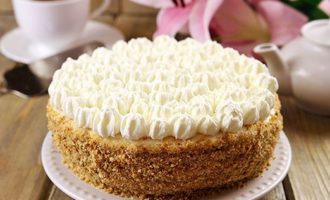
In order for the “Milk Girl” to soak well, it needs to be placed in the refrigerator overnight or for the whole day if you baked the cake in the morning. Next, decorate the top of the cake, for example, with whipped cream roses using a culinary syringe, as shown in the photo.
-
Serve your cake to the table and enjoy its delicate creamy taste.
Bon appetit!
Cake “Milk Girl” with cream cheese cream
From the specified amount of products you will get a large, heavy cake of ten layers soaked in delicate butter cream. Bake such a culinary masterpiece for a large company, because it cannot be stored for a long time, and you can’t eat a lot of it - the cake is high in calories and sweet.
Ingredients:
For the cakes:
- Condensed milk – 600 ml.
- Eggs – 1-3 pcs.
- Flour – 220 gr.
- Baking powder – 15 gr.
For cream:
- Soft curd cheese – 500 gr.
- Heavy cream (from 33%) – 150 ml.
- Powdered sugar – 100 gr. or to taste.
Cooking process:
1. Beat condensed milk with eggs until bubbles form.
2. Sift the flour, combine with baking powder, add to the liquid dough base, stir everything well.Let the dough sit for 15 minutes so that the baking powder begins to make the dough fluffier.
3. If you do not have a silicone mat with circles of different diameters, then draw equal circles on parchment with a diameter of at least 18-22 cm.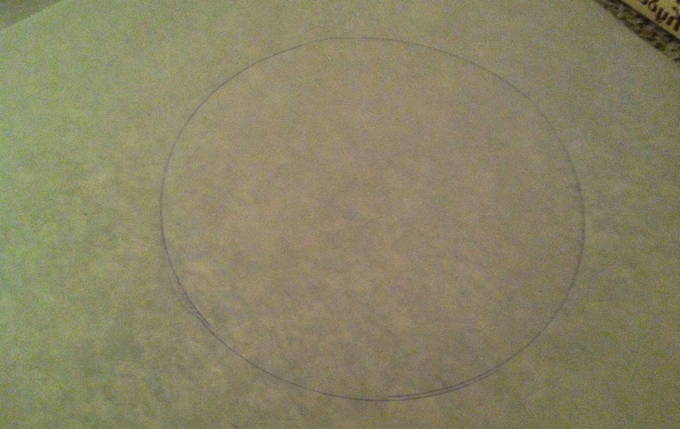
4. The parchment needs to be slightly oiled so that the cakes do not stick. Spread 2-3 tablespoons of dough onto each circle and smooth it out well.
5. Bake the cakes in an oven preheated to 180 degrees for at least 5 minutes so that they brown but do not dry out.
6. Cool the cakes on a flat surface, removing them from the parchment, otherwise they will dry out to it.
7. Make the cream by mixing cheese and powdered sugar in a blender - beat them at low mixer speed.
8. Next, add the cream and start whipping the cream at low speed first, and then switch to high speed. If you like a thinner cream, you can add more cream than indicated in the recipe.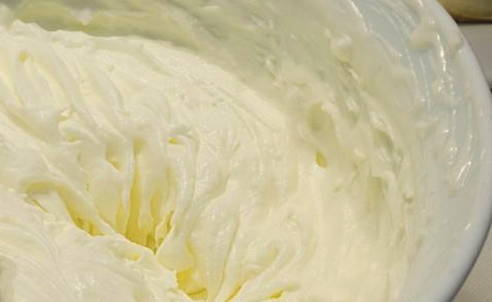
9. If you want a more even cake, you can cut the cakes according to the template, aligning their edges.
10. Assemble the cake on a plate, covering it with cream so that the cake does not slip from below. Coat each cake well with cream, as well as the top and sides of the cake.
11. Leave the cake in the refrigerator for at least 6-8 hours. The top of the cake can be decorated with candied fruits, fresh berries, cake crumbs, grated white chocolate or crushed nuts. Show your imagination, focusing on your taste!
Bon appetit!
A simple and delicious recipe for “Milk Girl” with ice cream
With homemade ice cream, this cake will taste a little like everyone’s favorite ice cream, especially when the cake is just taken out of the refrigerator. Bake it, it will be very tasty!
Ingredients:
For the cakes:
- Eggs – 2 pcs.
- Flour – 150 gr.
- Condensed milk - 1 can.
- Baking powder – 15 gr.
For cream “Ice cream”:
- Egg – 1 pc.
- Starch - 3 tbsp. l.
- Full-fat sour cream – 350 ml.
- Sugar or powder – 100 gr.
- Vanilla sugar – 20 gr.
- Butter – 120 gr.
Cooking process:
1. Beat the eggs until foamy, then add condensed milk and beat again.
2. Stir baking powder into the flour, add to the liquid component and stir until smooth.
3. Let the dough stand for 15-20 minutes so that under the influence of the baking powder it begins to rise a little and become airier.
4. Bake the cakes on a silicone mat with circular markings or on parchment paper, drawing a circle with a diameter of 20-22 cm on it. Spread the dough in a circle with a spoon (2-3 spoons per circle). The dough will seem a bit small, but the cake will rise in the oven.
5. Then bake the cakes at 180 degrees in an already heated oven for no more than 5-7 minutes, so that the cakes are browned. You should have 5-7 cakes. You can check the readiness of the cake by pressing on it: when the cake is ready, it springs a little and does not stick to your hands.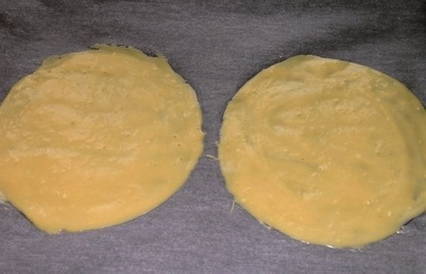
6. Remove the cake from the paper while it is hot and place it on a flat surface to cool. So cool all the cakes.
7. Beat the egg with sugar for the cream, add sour cream, vanilla sugar (or vanilla on the tip of a knife). Next add starch, preferably corn starch. If there is no starch, it can be replaced with premium wheat flour.
8. In a water bath or over very low heat, bring the cream until bubbles appear, stirring all the time. When bubbles appear and the cream thickens, remove it from the heat.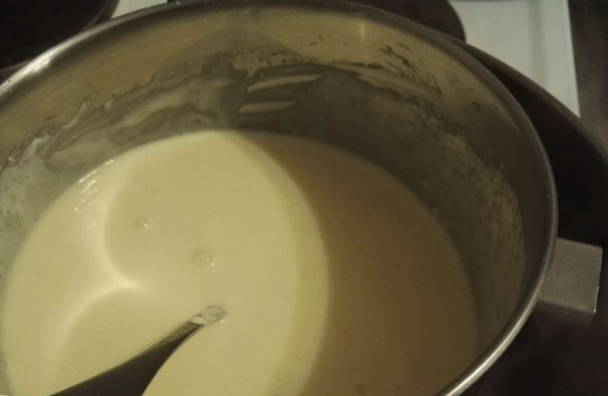
9. Let the cream cool, covering it with film. Add the whipped butter to the cooled custard and whisk everything together until you have a fluffy custard.
10.The cakes can be aligned according to the template by trimming the edges so that the cake has a more even and neat appearance.
11. Thickly coat each cake with cream, place the first cake on a dish on which the cream has already been lightly spread.
12. Thickly coat the sides of the cake and the top with cream, smooth it with a spatula or spatula.
13. Let the cake sit in the cold for 8-12 hours, then decorate the top with, for example, white chocolate shavings, and serve.
Bon appetit!
Cake “Milk Girl” with curd cream
With curd cream according to this recipe, you can prepare a moderately juicy “Milk Girl” cake with boiled condensed milk. For the cream you need to use soft cottage cheese, also keep in mind that cakes with the addition of condensed milk turn out sweet, so the cream should not be too sweet. From these products you will get a fairly heavy and large cake, which should be stored in the cold for no more than three days, since it contains fresh cottage cheese.
Ingredients:
For the cakes:
- Eggs – 2 pcs.
- Premium flour – 1-1.5 tbsp.
- Boiled condensed milk – 1 can.
- Baking powder – 15 gr.
For cream:
- Heavy cream – 350 ml.
- Powdered sugar – 3-4 tbsp. l.
- Soft cottage cheese – 250 gr.
Cooking process:
1. The dough for the cakes is simple to make, just combine all the ingredients and use a whisk or mixer to mix it all until smooth.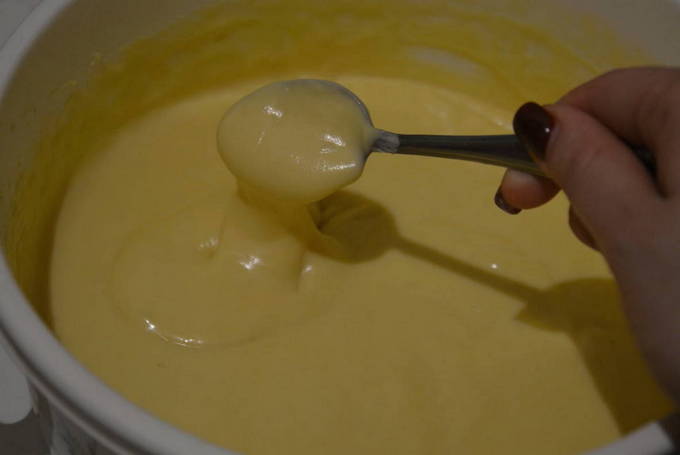
2. From the specified amount of dough you will get 5-6 cakes. Draw circles with a diameter of 20-22 cm on baking paper, spread the dough in the amount of 2-3 spoons on each circle.
3. Bake the cakes at 180 degrees in a heated oven for 5-7 minutes.
4. For the cream, beat the cream with powdered sugar until elastic foam appears.
5.Add soft cottage cheese to the whipped cream and beat everything quickly again to get a homogeneous, fluffy mass.
6. Assemble the cake on a large, flat plate, brushing all the layers with cream. The cakes need to be pressed lightly with your hands so that they are better soaked.
7. Let the cake soak overnight or for 8 hours in a cold place (in the refrigerator), and then serve it to the table.
Enjoy your tea!
Milk Girl recipe from Andy Chef
And here is another original author’s recipe for the “Milk Girl” cake with peaches added to the cream. For this recipe you will need heavy cream - at least 33 percent.
Ingredients:
For the cakes:
- Eggs – 2 pcs.
- Condensed milk - 1 can.
- Butter – 100 gr.
- Flour – 200 gr.
- Baking powder – 1 tsp.
For cream:
- Heavy cream – 650 ml.
- Canned peaches – 1 can.
- Powdered sugar – 100-150 gr.
For leveling cream and decoration:
- Curd cheese – 300 gr.
- Heavy cream – 100 ml.
- Powdered sugar - to taste.
- Berries - optional.
- Food coloring - optional.
For the ganache:
- White chocolate – 100 gr.
- Heavy cream – 100 ml.
Cooking process:
1. Beat eggs with condensed milk, then add melted but cooled butter and stir.
2. Add sifted flour and baking powder to the dough, mix to form a homogeneous, smooth dough.
3. On baking paper, draw a circle with a diameter of 20-22 cm. Place the paper on a baking sheet, circle down, it will be visible through.
4. Spread 2 tablespoons of dough in a circle and bake the cake at 180 degrees for 5-7 minutes.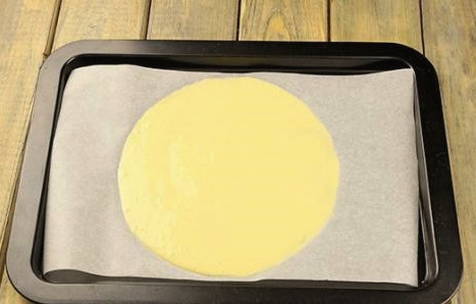
5. Bake all the cakes in the same way; When you remove the cakes from the oven, immediately remove them from the parchment and lay them out on the table to cool.
6.Prepare the cream from the cream, which you need to beat with powdered sugar until a thick, stable foam.
7. Cut the peaches into circles.
8. Assemble the cake, spreading cream over each cake layer, but place mugs of peaches not on each cake layer, but every other layer.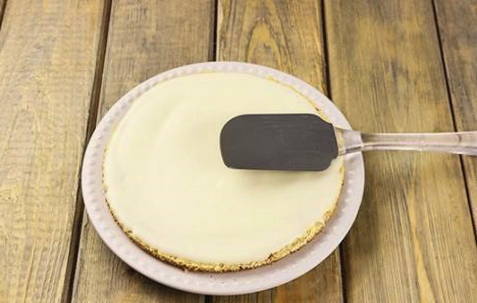
9. Let the cake soak in the cream for at least 6 hours in the refrigerator.
10. Prepare the leveling cream by mixing cream cheese, powdered sugar and heavy cream (you can add any color of food coloring if you want if you don't want a white cake). Whip the cream and cool.
11. Cover the cake with leveling cream using a spatula.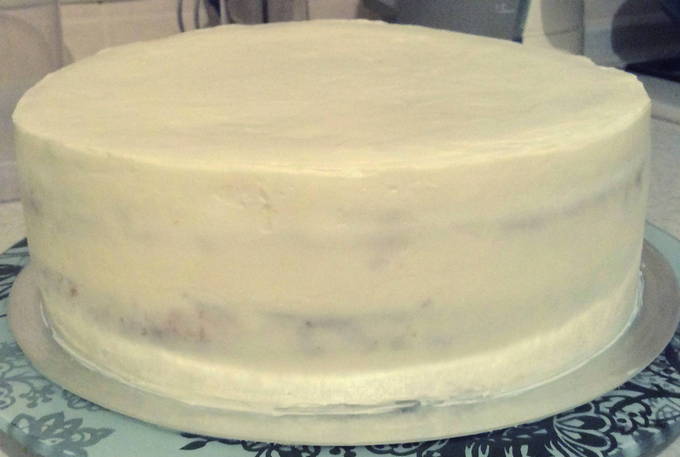
12. To make the ganache, boil the cream, add white chocolate chips and remove from heat.
13. Let the ganache cool slightly, pour it into a syringe or into a cooking bag and draw beautiful patterns on the cake.
14. Now you can serve such a wonderful masterpiece to the table!
Bon appetit!
Recipe for "Milk Girl" cake from Grandma Emma
We offer you a recipe for the “Milk Girl” cake, which is recommended by the popular video blogger Grandma Emma. According to reviews, the cake baked according to this recipe turns out very tasty! Condensed milk is the main ingredient here not only for the cakes, but also for the cream.
Ingredients:
For the test:
- Baking powder – 15 gr.
- Condensed milk – 500 gr.
- Flour – 250 gr.
- Eggs – 3 pcs.
For cream:
- Condensed milk – 250 gr.
- Cream – 1 l.
- Vanillin - to taste.
Cooking process:
1. For the dough, condensed milk and eggs need to be mixed until smooth.
2. In another container, mix flour with baking powder and sift into the liquid component of the dough.
3. Knead the dough until smooth with a whisk or using a mixer.
4. The dough should stand for a while so that it will fit better in the oven.During this time you should draw circles on baking paper for the cakes. Diameter – 20-22 cm. There should be two such circles in order to bake the cakes one by one.
5. To prevent the cakes from burning, you need to lightly grease them with any butter or margarine before baking.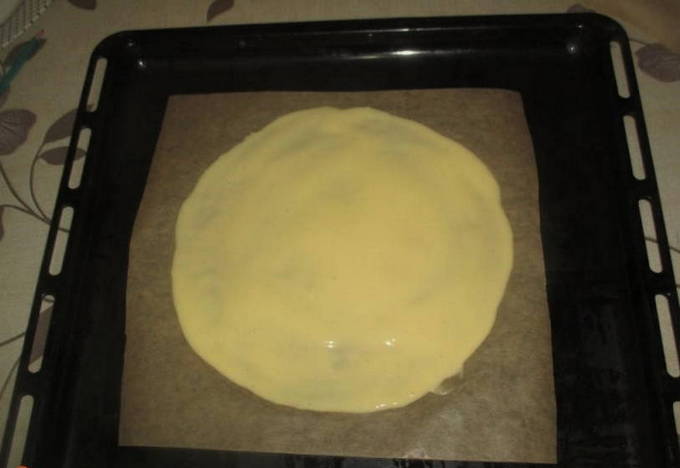
6. 15 minutes after kneading, start baking the cakes in an oven heated to 180 degrees. Spread the dough onto each circle with a spoon (2-3 spoons), place the cakes in the oven and bake for no more than 5-7 minutes until they brown.
7. When you remove the cakes from the oven, immediately remove them from the paper and place them on the table so that they cool evenly (do not place the cakes one on top of the other, otherwise they will stick together). If you don't have much space in the kitchen, then you can stack the cakes, but you need to lay a towel or a sheet of parchment on each bottom cake to avoid the cakes sticking together.
8. For the cream, beat the heavy cream with vanilla until thick. Without stopping whipping, add condensed milk to the cream and continue whipping the cream.
9. Assemble the cake, coating the cakes with cream, and finally coat the cake on the side and top.
10. Then the cake can be sprinkled with chopped nuts or crumbs, which can be made from one cake layer if you dry it in the oven for another 5 minutes.
11. Soak the cake in a cold place for at least 6-8 hours, then decorate as you wish (with berries and mint leaves) and serve.
Bon appetit!
Cake “Milk Girl” - recipe from Olga Vashurina
Olga Vashurina is a famous winner of the television competition “Confectioner” of the first season. The woman continues to amaze audiences on television and Instagram with her sweet creativity. We offer you her recipe for “Milk Girl” with nut and berry filling.
Ingredients:
For the cakes:
- Eggs – 2 pcs.
- Condensed milk - 1 can.
- Flour – 150 gr.
- Baking powder – 10 gr.
For cream:
- Egg – 1 pc.
- Sugar – 150 gr.
- Flour – 2 tbsp. l.
- Heavy cream – 300 ml.
- Vanillin - to taste.
- Butter – 50 gr.
- Nut crumbs - optional.
- Berries - optional.
Cooking process:
1. Beat the eggs until fluffy with a mixer or whisk (to help them beat better, drop some lemon juice on the eggs).
2. Add condensed milk and sifted flour along with baking powder into the egg foam.
3. Knead the dough well and carefully, trying to prevent the egg foam from falling off. You should have a smooth, homogeneous dough.
4. On baking paper with a pencil, draw a circle with a diameter of approximately 20 cm. There should be 7-9 such blanks.
5. Place 2-3 spoons of dough on each piece and spread them well, without going beyond the edges of the circle.
6. Bake the cakes in an oven heated to 180 degrees until each cake is golden brown, which will take you about 5 minutes for each cake.
7. Beat the egg and sugar for the cream.
8. Next, add flour, cream and vanillin to the cream and mix everything well with a whisk.
9. Over low heat or in a water bath, bring the cream to heat and thicken, stirring all the time so as not to burn.
10. Add melted butter to the already thick and starting to bubble, but not boiling cream, stir and remove the cream from the heat.
11. Next, let the cream cool a little and beat it with a mixer until fluffy.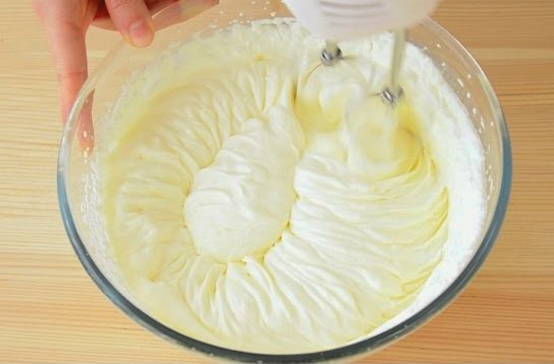
12. Assemble the cake on a flat plate, coating each cake well with cream. Between the layers, sprinkle the cream with chopped nuts, and also lay out any berries. If the berries are large (strawberries), they need to be finely chopped.
13.Grease the top and sides of the cake generously with cream, sprinkle with nuts and decorate with berries just before serving, otherwise the berries will become soggy.
14. Before serving, refrigerate the cake for at least 8 hours.
Bon appetit!
A simple and delicious recipe for “Milk Girl” with fruits
Cooks who have already baked the “milk girl” cake say that anyone can do such baking, because the dough for the cakes is easier to prepare than sponge dough and is always baked. And with cream it’s even easier - beat all the ingredients with a mixer into a homogeneous mass and you’re done! If you want this cake to have some fruit flavor, add fresh fruit to the cream: bananas, peaches, raspberries, cherries, strawberries, etc.
Ingredients:
For the test:
- Condensed milk – 1 can.
- Chicken eggs – 2 pcs.
- Flour – 200 gr.
- Baking powder – 1.5 tsp.
- Vanillin - on the tip of the knife.
For cream:
- Any curd cheese or soft cottage cheese – 300 gr.
- Heavy cream – 400 gr.
- Powdered sugar – 40 gr.
- Bananas – 2-3 pcs.
Cooking process:
1. Place the eggs along with condensed milk in a large, convenient bowl and beat them with a mixer, adding vanillin so that the cakes have a more pleasant aroma.
2. Sift the flour over the same bowl, add baking powder and use a mixer at low speed or simply use a spatula to knead the mixture for the cakes.
3. Using a pastry ring placed on baking paper, form a circle for the cake, then grease it with dough (2-3 spoons of dough for each cake). If you don't have a ring, then simply draw a circle on baking paper and brush it with dough. Prepare each new cake in the same way. Grease baking paper with oil to prevent the cakes from burning.
4. Bake the cakes in an oven heated to 180 degrees for no more than 5-7 minutes.
5.Remove the hot cakes from the paper so that they do not stick to it, and then lay them out on the table to cool.
6. Make the cream for the cake by placing all the ingredients for it in a bowl. Cut the bananas into circles. Then beat everything together with a mixer until a thick, homogeneous mass.
7. When all the cakes have cooled, assemble the cake on a large platter or plate, coating each cake well with cream.
8. Lastly, coat the sides and top of the cake (the cake layers can be cut in advance according to a template, for example, along a pan lid, so that they are perfectly round).
9. Let the cake stand in the refrigerator for at least 8 hours, then decorate the top as you wish and serve!
Bon appetit!
Advice: To decorate the “Milk Girl” fruit or berry cake, you can use berries and fruits, both fresh and frozen, but make sure that they do not become sour - this will not look aesthetically pleasing.
How to make “Milk Girl” cake with mascarpone?
As practice shows, light and soft mascarpone cheese goes very well with cream, cream, and on its basis you can perfectly soak the layers of the “Milk Girl” cake. This cream turns out delicate and just very creamy! For taste, you can add vanillin, rum or any other flavoring to the cream, or you can leave its original taste.
Ingredients:
For the test:
- Condensed milk - 1 can.
- Eggs – 2 pcs.
- Flour – 1 tbsp.
- Vanillin - on the tip of the knife.
- Baking powder – 10 gr.
For cream:
- Mascarpone cheese – 250 gr.
- Heavy cream – 400 ml.
- Condensed milk – 0.5 cans.
- Vanillin - to taste.
Cooking process:
1. Place condensed milk in a large container, add raw eggs and beat everything together until foam appears.
2.Sift the flour, then add vanilla if you want its taste to be felt in the cake. Add baking powder.
3. Gently mix the flour into the eggs and condensed milk until you have a sour cream-like dough.
4. To bake the cakes, place a few spoonfuls of dough onto a circle drawn on parchment paper and gently spread the dough. Do this with all the cakes.
5. Bake the cakes for 5 minutes at 180 degrees, the oven should already be heated.
6. While the cakes are still warm, quickly separate them from the baking paper and place them on the table, but not in a pile, otherwise they will stick together.
7. If you need a perfectly even cake, then trim the sides of the cakes according to a round template, cutting off any irregularities.

8. To make the cream, you need to place all the ingredients for the cream specified in the recipe in one container and beat with a mixer until the cream thickens.

9. Place the cake on a flat plate. Soak each cake well with cream, and at the end, grease the sides and top of the cake with cream. The sides can be leveled using a wide spatula.

10. Decorate the top of the cake.
11. Place the cake in a cool place (refrigerator) overnight or for 8 hours.

12. Serve the finished Milk Girl cake with hot tea or coffee.
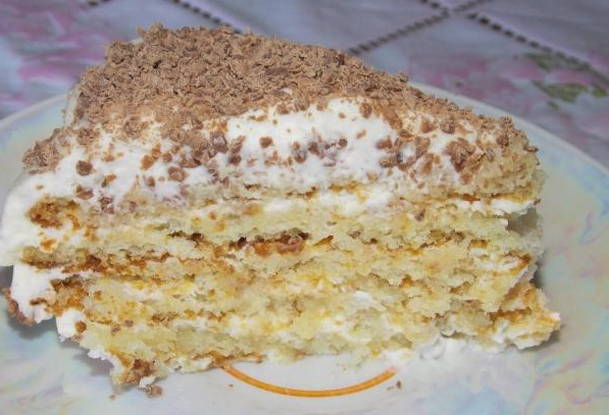
Bon appetit!
“Milk girl” with sour cream at home
The “Milk Girl” cake with sour cream is even easier to make than other varieties of this pastry, because such a simple cream is prepared as quickly as possible, but the taste of the cake does not suffer at all from this, but simply becomes a little different. Try it!
Ingredients:
For the test:
- Condensed milk – 1 can.
- Eggs – 2 pcs.
- Flour – 1 tbsp.
- Baking powder – 1 tsp.
- Salt – 1 pinch.
For cream:
- Sour cream – 150 ml.
- Boiled condensed milk – 150 ml.
Cooking process:
1. Whisk the eggs with the condensed milk in a large bowl until well foamed.
2. Add flour, a little salt and baking powder to these ingredients, knead well until the dough becomes liquid and homogeneous.
3. Bake 5-6 cakes on baking paper. To do this, you need to draw a circle with a diameter of 22 cm with a pencil on paper, and carefully spread 3 tablespoons of dough over this circle.
4. Heat the oven to 180 degrees, place the paper with dough on a baking sheet and bake the cake for no more than 5-7 minutes. While one cake is baking, spread the other cake, etc.

5. To make a quick cream, beat sour cream with a mixer or whisk with boiled condensed milk in a suitable container.
6. When you remove the cakes from the paper, do not place them one on top of the other, but let them cool on the table so that they do not stick together.
7. Grease the cooled cakes with a thick layer of cream, forming a cake, and then grease the sides and top of the “Milk Girl” cake with the cream.
8. Decorate the top of the cake as you wish: fresh berries, pieces of fruit, small cookies, etc.
Bon appetit!

