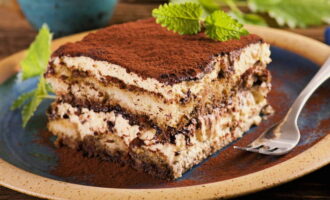
Yogurt cake is a very bright and tasty homemade dessert that will decorate and complement any holiday. The finished delicacy is incredibly tender, light and moderately sweet. To prepare such a cake, we recommend using our proven selection of ten recipes at home with step-by-step photos.
Sponge cake with yoghurt cream
Sponge cake with yoghurt cream is a very tasty and original treat for your home party. A delicate and light cake will be the perfect complement to a cup of hot tea or coffee. To prepare, be sure to take note of our proven step-by-step recipe with photographs.

- Flour 1 (glasses)
- Chicken egg 5 (things)
- Granulated sugar 2 (glasses)
- Cream 2 Art. (33% fat)
- Yogurt ½ l. (fruit)
- Gelatin 30 (grams)
- Lemon juice 2 (tablespoons)
- Water 100 (milliliters)
- Berries For decoration
- Chocolate For decoration
-
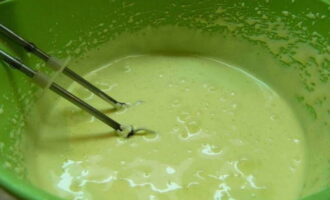
In a deep bowl, combine eggs with one glass of sugar. Beat the ingredients until a fluffy foam forms.
-
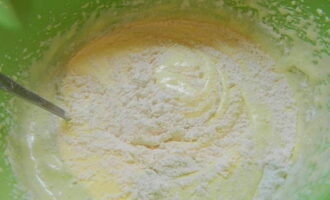
Sift the flour into this mixture and mix everything carefully so that there are no lumps.
-
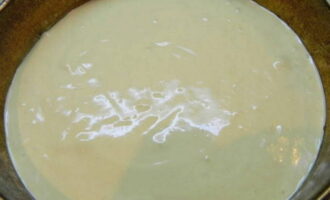
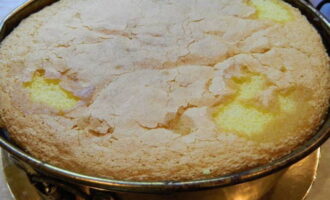
Pour the soft, homogeneous dough into a baking dish.Cook the biscuit for 25-30 minutes at a temperature of 180 degrees.
-
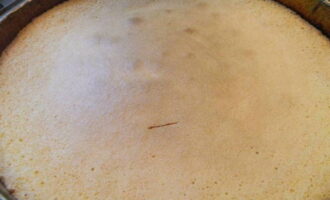
After a while, remove the cake from the oven. You can check readiness with a toothpick. If it does not stick, then the product is sufficiently baked.
-
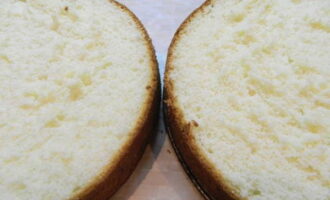
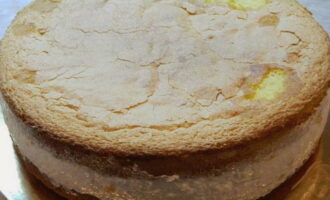
Carefully cut the cooled biscuit into two layers of equal thickness.
-
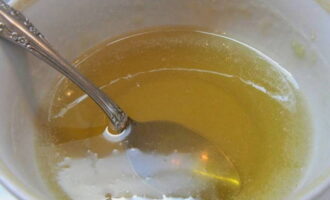
We dilute gelatin in water. Mix and leave to swell.
-
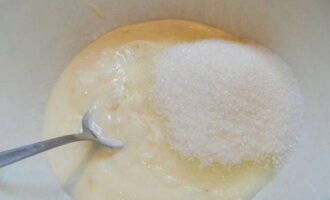
In a deep bowl, combine the yogurt with the remaining glass of sugar. Mix.
-
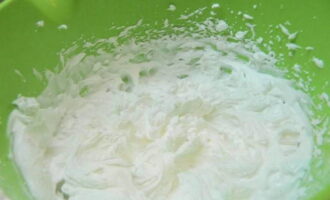
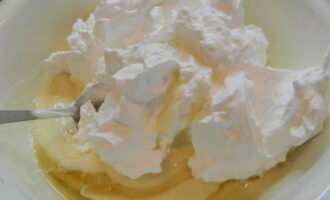
Whisk the heavy cream separately until stiff peaks form.
-
Combine yogurt, whipped cream, gelatin and lemon juice. Mix carefully. Leave some of the cream for decoration.
-
Place one cake layer into the molding ring, cover it with yogurt cream, and cover with the second cake layer. Let it harden in the refrigerator for one and a half to two hours.
-
We take the workpiece out of the refrigerator and carefully remove the ring.
-
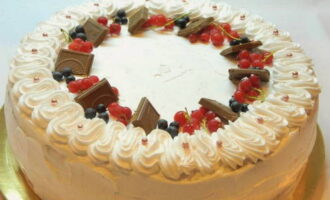
Decorate the cake with cream, berries and chocolate pieces.
-
The delicious sponge cake with yogurt is ready. Divide into portions and enjoy!
Curd and yoghurt cake
Curd and yoghurt cake is a delicate and very tasty dessert that will be difficult to resist. Prepare this delicacy for a family tea party or holiday table. This light and airy cake will win the hearts of all your guests. Be sure to try our proven step-by-step recipe.
Cooking time – 3 hours
Cooking time – 30 minutes
Servings – 8
Ingredients:
- Flour – 50 gr.
- Egg – 2 pcs.
- Sugar – 50 gr.
- Starch – 10 gr.
- Baking powder – 0.5 tsp.
- Vanilla sugar – 1 tsp.
For impregnation:
- Water – 50 ml.
- Sugar – 2 tsp.
For the curd-yogurt layer:
- Cottage cheese – 450 gr.
- Natural drinking yogurt – 200 gr.
- Cream 33% – 150 ml.
- Powdered sugar – 130 gr.
- Vanilla sugar – 1 tsp.
- Gelatin powder – 25 g.
- Strawberries – 200 gr.
For decoration:
- Strawberries – 300 gr.
- Strawberry jelly for cake – 1 sachet.
Cooking process:
Step 1. Carefully separate the whites from the yolks. Beat the egg whites with half the sugar until fluffy.
Step 2. Also beat the yolks until foamy along with the remaining regular sugar and vanilla.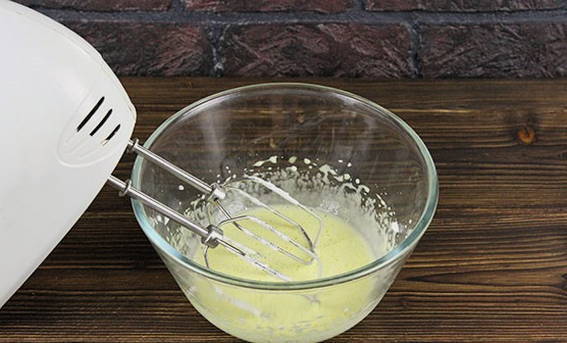
Step 3. Carefully transfer the yolk mixture into the white mixture. Mix the whole mass.
Step 4. Sift flour with starch and baking powder here. Mix with a spatula.
Step 5. Place the prepared product in a mold lined with parchment. Place in an oven preheated to 180 degrees for 15-20 minutes.
Step 6. Cool the resulting biscuit. Carefully cut off the top. Soak the neat crust with a mixture of water and sugar.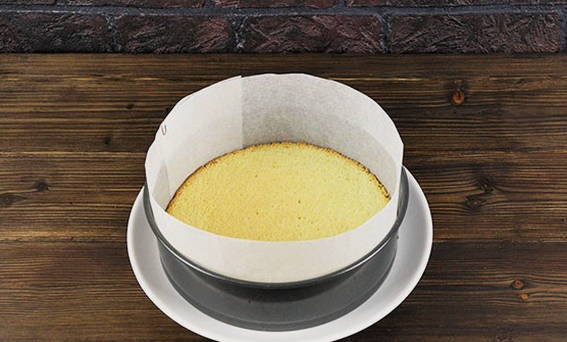
Step 7. Prepare the cream. In a deep bowl, combine cottage cheese with vanilla sugar and powdered sugar. Grind the products using a blender.
Step 8. Pour yogurt here and continue grinding everything with a blender.
Step 9. Fill the gelatin with water in a separate container. Mix and leave to swell.
Step 10. In a separate bowl, beat the cream to stable peaks.
Step 11. Add whipped cream and gelatin to the curd-yogurt mixture, which we preheat until the dry product dissolves and cool.
Step 12. Cut the strawberries into small cubes. Place in cream. Mix.
Step 13. Spread the prepared cream on the cake. Assemble the cake in a springform pan. Place in the refrigerator until the top layer has completely hardened.
Step 14. After hardening, decorate the dessert with strawberries.
Step 15. Prepare strawberry jelly for the cake and pour it over fresh berries.
Step 16. Place the cake in the refrigerator again, but this time to harden the berry layer.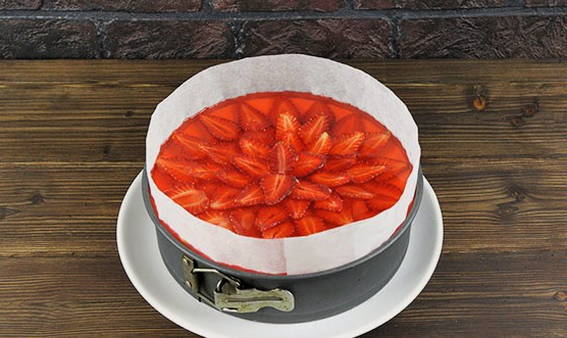
Step 17Carefully remove the pan and transfer the cake to a flat plate.
Step 18. The tender and delicious curd and yogurt cake is ready. Divide into portions and enjoy!
Homemade yogurt cake
Homemade yogurt cake is easy to prepare using a proven step-by-step recipe with photos. Be sure to take note of our culinary idea to please yourself and your loved ones. The finished taste of the homemade cake will amaze you with its tenderness, airiness and attractive appearance.
Cooking time – 4 hours
Cooking time – 1 hour
Servings – 8
Ingredients:
- Flour – 2 tbsp.
- Egg – 2 pcs.
- Sugar – 1 tbsp.
- Vegetable oil – 5 tbsp.
- Berry yogurt – 290 gr.
- Yogurt with prunes – 290 gr.
- Baking powder – 1.5 tsp.
- Condensed milk – 380 gr.
- Agar-agar – 5 tbsp.
- Water – 1 tbsp.
Cooking process:
Step 1. Combine chicken eggs with sugar.
Step 2. Beat the ingredients until a homogeneous fluffy mass is formed.
Step 3. Pour yogurt and prunes into this mixture. We continue to beat.
Step 4. Add vegetable oil here. Beat for a couple more minutes.
Step 5. Sift flour and baking powder into the resulting mixture. Start kneading with a spatula until smooth.
Step 6. Pour the dough into a baking pan lined with parchment. Bake for 35 minutes at 180 degrees.
Step 7. Once ready, let the biscuit lie in the pan for 5 minutes and remove to cool.
Step 8. After cooling, cut the sponge cake into two layers.
Step 9. Place one cake layer in a springform pan.
Step 10. In a blender, combine berry yogurt with condensed milk. Whisk.
Step 11. Pour in agar-agar, which we first boil in water. Add while whipping.
Step 12. Pour half of the yogurt cream onto the crust.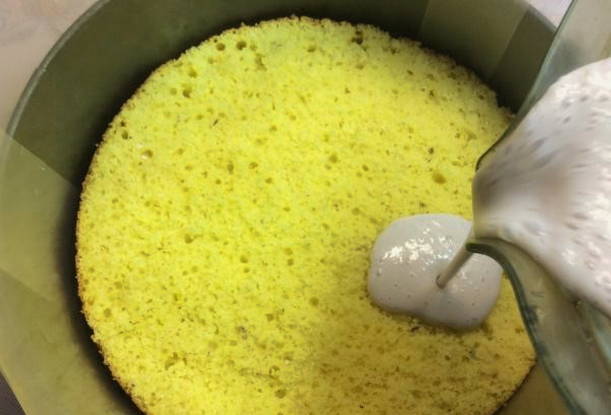
Step 13. Cover with the second cake layer and add cream.
Step 14. Place the dough in the refrigerator until completely frozen. This will take approximately 2-3 hours.
Step 15. After hardening, the surface of the dessert can be decorated as you wish.
Step 16. The delicious homemade yogurt cake is ready. You can try!
No-Bake Yogurt Cake
No-bake yogurt cake is an interesting and delicious treat for your holiday table. Anyone can prepare an original dessert. To do this, use a proven recipe with step-by-step descriptions and photographs. Treat yourself and surprise your loved ones!
Cooking time – 5 hours.
Cooking time – 30 minutes
Servings – 8
Ingredients:
- Shortbread cookies – 1 pack.
- Butter – 150 gr.
- Sugar – 2 tbsp.
For the yogurt layer:
- Sweet yogurt – 0.5 l.
- Milk – 100 ml.
- Gelatin – 6 gr.
- Heavy cream 35% – 200 ml.
For strawberry jelly:
- Strawberries – 0.5 kg.
- Water – 100 ml.
- Gelatin – 6 gr.
- Lemon juice – 2 tbsp.
- Sugar – 60 gr.
Cooking process:
Step 1. Grind the shortbread cookies into fine crumbs and place them in a deep bowl. We supplement the ingredient with pieces of butter and sugar. Mix with a spatula until smooth.
Step 2. Coat a baking dish with removable sides with butter. Place the cookie dough here in a thick layer. Place in the refrigerator for 30 minutes.
Step 3. Let's start preparing the cream. Combine gelatin with milk and put on fire. Stir until the crystals dissolve. Afterwards, filter the solution and cool. Combine it with yogurt and whipped cream until stiff.
Step 4. Fill the frozen cake with cream. Place the mixture in the refrigerator for another two hours.
Step 5. At this time, prepare the strawberry jelly. Stir the gelatin in water and leave to swell.Boil a small amount of water with sugar. We also send gelatin here. Mix and strain.
Step 6. Grind strawberries with lemon juice and combine with gelatin syrup. Let it cool.
Step 7. Fill the cake with strawberry mixture. Place in the refrigerator again for two hours.
Step 8. The delicious no-bake yogurt cake is ready. Cut into portions and enjoy!
Cake with yogurt and gelatin
Cake with yogurt and gelatin is an incredibly tasty and original treat for your home or holiday table. A delicate and light cake will serve as an excellent addition to a cup of hot tea or coffee. To prepare, be sure to take note of our proven step-by-step recipe with photographs.
Cooking time – 7 hours
Cooking time – 1 hour
Servings – 8
Ingredients:
For light crust:
- Flour – 60 gr.
- Sugar – 70 gr.
- Egg – 1 pc.
- Sour cream – 2 tbsp.
- Baking powder – 1 tsp.
For dark crust:
- Flour – 60 gr.
- Sugar – 70 gr.
- Egg – 1 pc.
- Sour cream – 2 tbsp.
- Baking powder – 1 tsp.
- Cocoa – 2 tbsp.
For the yogurt jelly:
- Natural yogurt – 700 gr.
- Sugar – 6 tbsp.
- Gelatin – 25 gr.
- Water – 0.5 tbsp.
For cherry jelly:
- Cherry – 200 gr.
- Sugar – 3 tbsp.
- Gelatin – 15 gr.
- Berries - for decoration.
- Water – 300 ml.
Cooking process:
Step 1. Prepare the necessary ingredients according to the list.
Step 2. First, prepare the light cake layer. Beat the egg with sugar until the dry ingredient dissolves.
Step 3. Add sour cream, flour and baking powder to the egg mixture. Continue beating until a homogeneous mixture is obtained.
Step 4. Pour the prepared dough into a baking pan lined with parchment. Bake for 15 minutes at 200 degrees.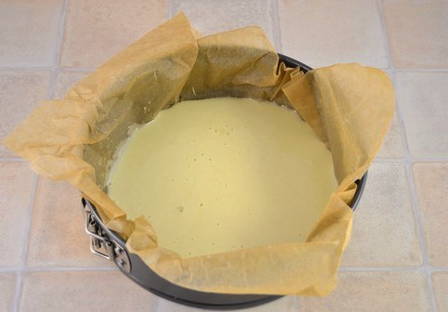
Step 5. Now let's prepare the dark cake.We prepare it the same way as the first one, only add cocoa at the end.
Step 6. Pour the dark dough into a baking pan with parchment. We also bake for 15 minutes at 200 degrees.
Step 7. Place both cake layers on a wire rack and let cool.
Step 8. Pour gelatin with half a glass of warm water. Stir and leave for 3-5 minutes. Then let it cool, stirring occasionally.
Step 9. Stir yogurt with sugar and prepared gelatin.
Step 10. Place the dark cake in a springform pan and fill it with half of the yogurt cream. Place in the refrigerator for two hours.
Step 11. Place a light cake layer on top of the frozen cream. Spread the remaining yogurt cream. Place in the refrigerator for 2 hours.
Step 12. Boil the cherries in 300 ml of water.
Step 13. Add sugar, mix and remove the berries with a slotted spoon.
Step 14. Add gelatin to the cherry compote, stir for about 3-5 minutes and let cool.
Step 15. Pour the cherry mixture over the cake and put it in the refrigerator for 2-3 hours.
Step 16. Carefully remove the frozen dessert from the mold.
Step 17. The bright cake with yogurt and gelatin is ready. Help yourself!
Homemade cake with yoghurt mousse
Homemade cake with yoghurt mousse is not only incredibly tasty, but also very attractive. The ideal solution for your home celebrations. The finished dessert will delight you with tenderness and airiness. Be sure to try making it yourself. To prepare, take note of the proven step-by-step recipe!
Cooking time – 6 hours
Cooking time – 1 hour
Servings – 8
Ingredients:
- Flour – 50 gr.
- Egg – 2 pcs.
- Starch – 10 gr.
- Sugar – 60 gr.
- Vanillin – 1 gr.
- Baking powder – 0.5 tsp.
For the yoghurt mousse:
- Yogurt – 0.6 l.
- Cream 33% – 0.5 l.
- Sugar – 150 gr.
- Vanillin – 1 gr.
- Gelatin – 30 gr.
- Water – 1/3 tbsp.
- Canned pineapple rings – 1 can.
- Canned pineapple pieces – 0.5 cans.
For the pineapple jelly:
- Pineapple syrup – 250 ml.
- Water - ¼ tbsp.
- Gelatin – 10 gr.
Cooking process:
Step 1. Combine eggs with sugar and vanilla, beat until fluffy foam is obtained.
Step 2. Pour sifted flour with baking powder and starch into this mixture. Continue beating at low speed
Step 3. Pour the dough into a baking pan, which we have previously covered with parchment. Bake for 15 minutes at 180 degrees.
Step 4. Fill the gelatin with cold water and leave to swell.
Step 5. For the mousse, combine yogurt with sugar and vanilla. Stir until the dry ingredients dissolve.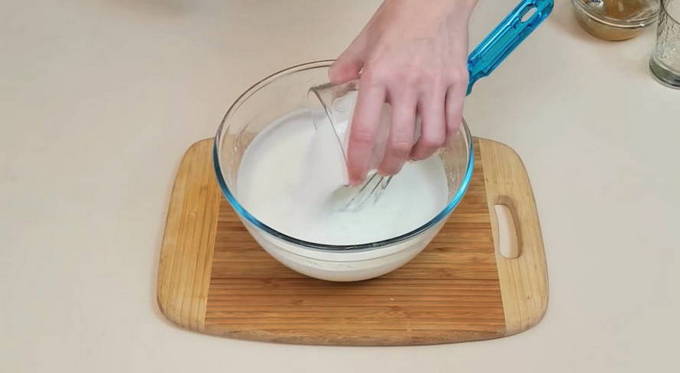
Step 6. Place the swollen gelatin over a water bath and melt it.
Step 7. Pour the prepared gelatin in a thin stream into the yogurt mixture. Stir continuously.
Step 8. Leave the mixture to cool.
Step 9. Separately, whip the cream until thick foam.
Step 10. Combine the cream with the yogurt mass.
Step 11. Carefully remove the cooled biscuit from the mold.
Step 12. Choose a suitable dish for the cake and cover it with parchment.
Step 13. Place the biscuit on a plate and coat it with a little pineapple syrup.
Step 14. Put a cooking ring on the sponge cake and pour in one fourth of the yoghurt cream mousse.
Step 15. Place pineapple half rings along the sides.
Step 16. Pour in the remaining cream mousse.
Step 17. Carefully level the surface using a spatula.
Step 18. Place the dough in the refrigerator for three hours.
Step 19. Soak the gelatin again and add it to the boiling pineapple syrup. Stir until dissolved, then let cool.
Step 20. Take the frozen syrup out of the refrigerator.Place the remaining pineapple half rings around the edges.
Step 21. Place pineapple cubes in the center and fill them with cooled jelly.
Step 22. Let the dessert harden again for two hours.
Step 23. The bright cake with yogurt mousse is ready. You can divide into portions and enjoy!
Yogurt cake with peaches
Yogurt cake with peaches is a very tasty, bright and delicate dessert. It is suitable for family gatherings or holidays. Anyone can cook at home. To do this, use a proven recipe with a step-by-step description of the process and photographs.
Cooking time – 6 hours
Cooking time – 1 hour
Servings – 8
Ingredients:
- Flour – 50 gr.
- Egg – 2 pcs.
- Sugar – 75 gr.
- Vanillin – 1 gr.
- Butter – 10 gr.
For the yogurt cream:
- Natural yogurt – 0.7 g.
- Powdered sugar – 170 gr.
- Vanillin – 1 gr.
- Instant gelatin – 25 g.
- Water – 100 ml.
For registration:
- Canned peaches – 5-6 halves.
- Jelly for cake – 1-2 sachets.
Cooking process:
Step 1. Combine the eggs with sugar and beat for about 5-7 minutes until thick and fluffy.
Step 2. Add vanillin here and sift the flour. Stir until smooth.
Step 3. Melt the butter, cool it and pour it into the total mass.
Step 4. Pour the mixture into a baking pan lined with parchment. Bake for 20 minutes at 180 degrees.
Step 5. For the cream, combine yogurt with vanillin and powdered sugar. Mix well.
Step 6. Pour gelatin into 100 ml of hot water, mix and cool.
Step 7. Mix gelatin with yogurt and pour it all onto the sponge cake in the mold. Place the mixture in the refrigerator for 2-3 hours.
Step 8. Cut the peaches into thin slices. Place them over the frozen cake.We dilute the jelly for the cake according to the instructions and pour it onto the peaches. Let it harden again.
Step 9. The bright yogurt cake with peaches is ready. You can treat yourself!
Strawberry yogurt cake
Strawberry-yogurt cake is a very tender and airy delicacy that is definitely worth trying to make. The finished dessert will perfectly complement your holiday or family tea party. Treat yourself to a light, melt-in-your-mouth treat. Be sure to take a proven step-by-step recipe from our selection.
Cooking time – 7 hours
Cooking time – 1 hour
Servings – 8
Ingredients:
- Flour – 180 gr.
- Egg – 6 pcs.
- Sugar – 180 gr.
- Butter – for greasing the mold.
For the yogurt cream:
- Yogurt – 400 gr.
- Sugar – 125 gr.
- Gelatin – 25 gr.
- Water – 55 ml.
- Strawberries – 0.5 kg.
- Lemon juice – 2 tbsp.
- Cream 35% – 200 ml.
- Raspberry jam – 4 tbsp.
For decoration:
- Strawberries - to taste.
- Cream 35% – 100 ml.
- Cream thickener – 1 sachet.
- Powdered sugar – 1 tbsp.
Cooking process:
Step 1. Grease a springform baking pan with butter and sprinkle with flour.
Step 2. Separate the whites from the yolks. Place the whites in the refrigerator for a while. Combine the yolks with sugar and beat until fluffy.
Step 3. Stir the egg mixture with the sifted flour. We also put well-beaten whites here. Mix the contents until smooth.
Step 4. Pour the dough into the prepared pan. Bake for 20-25 minutes at 180 degrees. Let the biscuit cool and cut it into two layers.
Step 5. Place gelatin in a saucepan, add water and leave for 10-20 minutes. Grind half the strawberries for the cream in a blender, cut the remaining berries into small pieces.
Step 6. Mix strawberry puree with sugar, yogurt and lemon juice.Let the gelatin dissolve over low heat and pour it into the overall creamy mass. Mix and put in the refrigerator for 10 minutes.
Step 7. Separately whip the cream and mix it into the yogurt mixture. We also put strawberry pieces here.
Step 8. Place one cake layer in a springform pan and pour half of the cream over it. Press with the second cake layer and coat with the remaining cream. Place in the refrigerator for 6 hours.
Step 9. After hardening, decorate the cake with pieces of strawberries and cream, whipped together with thickener and powdered sugar.
Step 10. Strawberry-yogurt cake at home is ready. Divide into portions and enjoy!
Yogurt cake with kiwi and banana
Yogurt cake with kiwi and banana is a very tasty and juicy dessert that can be prepared at home. To do this, use a proven step-by-step recipe from our culinary selection. Treat your loved ones to a bright fruit cake with original yogurt cream.
Cooking time – 6 hours
Cooking time – 1 hour
Servings – 8
Ingredients:
- Shortbread cookies – 150 gr.
- Butter – 70 gr.
- Kiwi – 3 pcs.
- Banana – 1 pc.
- Natural yogurt – 350 ml.
- Sugar – 2 tbsp.
- Instant gelatin – 2 tsp.
- Boiled water – 50 ml.
- Lemon juice – 1 tbsp.
Cooking process:
Step 1. Prepare the necessary ingredients according to the list.
Step 2. Grind the shortbread cookies into fine crumbs.
Step 3. Melt the butter in any convenient way.
Step 4. Pour the butter into the cookie crumbs. Mix thoroughly.
Step 5. Place a layer of cookies tightly into the springform pan.
Step 6. Peel the kiwis and cut them into small cubes.
Step 7. Place the fruit pieces in a deep bowl and cover them with sugar.
Step 8. Heat on the stove or in the microwave until the sugar dissolves.
Step 9Mix the gelatin with hot water, keep it over low heat and stir constantly. Do not bring to a boil.
Step 10. Mix kiwi with prepared gelatin and natural yogurt.
Step 11. Next, peel the banana and cut into thin slices.
Step 12: Place banana on cookie crust.
Step 13. Pour in the yogurt and kiwi mixture. Let the dough harden in the refrigerator for 4-5 hours.
Step 14. The bright and delicious yogurt cake with kiwi and banana is ready. You can treat yourself!
Yogurt cake with berries
Yogurt cake with berries is an incredibly tasty and interesting treat for your home holiday. A delicate and moderately sweet cake with berries will serve as an ideal complement to a cup of hot tea or coffee. To prepare a yogurt treat, be sure to take note of our proven step-by-step recipe with photos.
Cooking time – 7 hours
Cooking time – 1 hour
Servings – 8
Ingredients:
- Flour – 80 gr.
- Egg – 1 pc.
- Butter – 60 gr.
- Powdered sugar – 40 gr.
- Baking powder – 0.5 packs.
For cream:
- Greek yogurt – 600 gr.
- Cream 20% – 200 ml.
- Berries – 500 gr.
- Powdered sugar – 120 gr.
- Gelatin – 20 gr.
For decoration:
- Berries – 250 gr.
- Sugar – 85 gr.
- Water – 50 ml.
Cooking process:
Step 1. First, beat the softened butter with powdered sugar until smooth.
Step 2. We also send a chicken egg and sifted flour with baking powder here. Stir until smooth.
Step 3. Place the homogeneous dough in a neat layer in the pan on parchment.
Step 4. Bake for 15 minutes at 200 degrees, and then cool.
Step 5. Wash half the berries and grind them in a blender. You can use strawberries or any other berries.
Step 6. Cut the remaining half into small pieces.
Step 7Beat Greek yogurt with powdered sugar.
Step 8. Separately stir the cream with gelatin and heat the mixture to 60 degrees on the stove.
Step 9. Add cream with gelatin to yogurt. We also send pieces of berries here and mix everything carefully.
Step 10. Place the finished cake in a removable pan. Fill the base with yogurt cream.
Step 11. Water the surface with strawberries crushed in a blender. We put the workpiece in the refrigerator for 6 hours.
Step 12. To decorate, wash and finely chop the strawberries.
Step 13. Carefully pour the syrup from water and berries over the berries. Pour the mixture over the frozen cake.
Step 14. The aromatic yogurt cake with berries is ready. You can serve it to the table!


